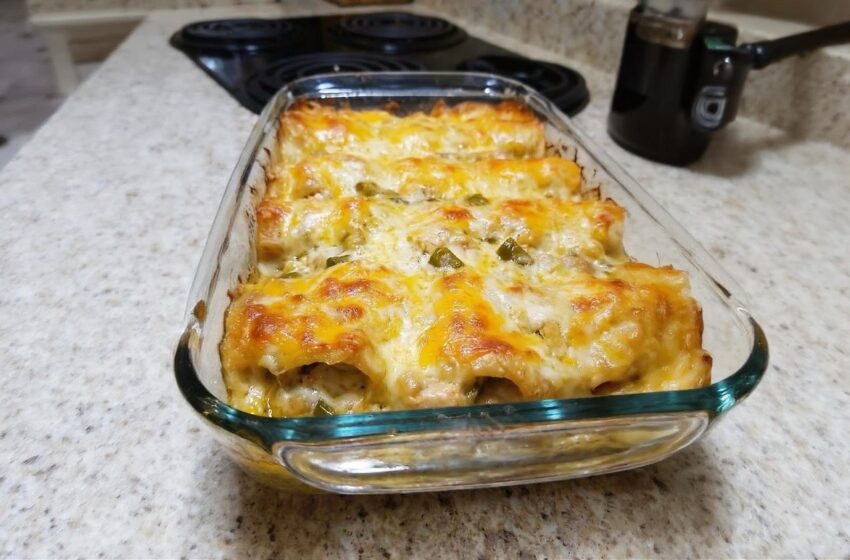
These Green Chili Chicken Enchiladas are a perfect blend of creamy chicken, tangy green chiles, and melty cheese—all wrapped up in warm tortillas and baked to golden perfection. This recipe brings back memories of classic family dinners, adapted with fire-roasted chiles and pepper jack cheese for a little extra kick. It is the ultimate comfort food that delivers big flavor, even bigger satisfaction, and keeps the prep incredibly easy and approachable!
Why You’ll Love This Recipe
🌶️ Bold & Creamy: The combination of zesty green chiles, rich sour cream, and melty cheese is an absolute match made in heaven.
⏱️ Make-Ahead Friendly: You can easily prepare and assemble these in advance, then simply pop them in the oven when you’re ready to eat.
✨ Family-Approved: Features a mild, crowd-pleasing spice level with toppings that everyone can customize to their own liking.
🎉 Amazing Leftovers: As the flavors meld together in the fridge, these taste even better the next day!
Recipe Overview
- Prep time: 25 minutes
- Cook time: 20 minutes
- Total time: 45 minutes
- Yield: 6–8 Servings
What You’ll Need
- 1 ½ lbs Boneless, skinless chicken breast: The hearty protein base for your creamy filling.
- ½ cup Canned diced fire-roasted green chiles: Adds that signature tangy, slightly smoky flavor.
- ½ cup Sour cream: To make the chicken filling rich and velvety.
- 10 Flour tortillas: (Or 6-inch corn tortillas) for the soft, warm wrappers.
- 2 cups Green chile enchilada sauce: To generously smother the assembled tortillas.
- 5 oz Grated pepper jack cheese & 5 oz Grated mild cheddar cheese: For the perfect gooey, melted topping and filling binder.
- 2 tbsp Olive oil: For searing the chicken.
- Fresh Garnishes: 2 tbsp sliced green onions and 1 tbsp chopped fresh cilantro.
- Seasonings: 1 tsp ground cumin, ½ tsp garlic powder, ½ tsp kosher salt, and ½ tsp black pepper.
How to Make It (Step-by-Step)
Step 1: Preheat and Prep
Preheat your oven to 400°F (204°C) and set the rack to the middle position. Pat the chicken breasts dry. Cut each in half horizontally to make thinner cutlets, place them in a bag, and gently pound them to about ½-inch thick. Season both sides with salt and pepper.
Step 2: Cook the Chicken
Heat the olive oil in a sauté pan over medium heat. Add the chicken and cook for 4–6 minutes per side until golden and cooked completely through (internal temp should reach 160–165°F).
💡 Crucial Step: Let the chicken rest for 10 minutes off the heat before shredding it! This allows the juices to redistribute so the meat doesn’t dry out.
Step 3: Make the Filling
In a mixing bowl, combine the shredded chicken, sour cream, green chiles, ¼ cup of the pepper jack cheese, ¼ cup of the cheddar cheese, green onions, cumin, garlic powder, salt, and pepper. Mix well and set aside.
Step 4: Warm the Tortillas
Warm each tortilla briefly on a hot skillet or over a gas flame until soft and pliable. Stack them and cover with a towel to keep them warm so they don’t tear while rolling.
Step 5: Assemble the Enchiladas
Lightly grease a 13×9-inch baking dish. Spread ½ cup of the green chile enchilada sauce evenly across the bottom. Fill each tortilla with about ⅓ cup of the chicken mixture, roll it up tightly, and place it seam-side down in the dish so it stays closed. Repeat with the remaining tortillas.
Step 6: Top and Bake
Pour the remaining enchilada sauce evenly over the top of the rolled tortillas and sprinkle generously with the remaining cheeses. Cover the dish loosely with foil and bake for 15–20 minutes, until the cheese is completely melted and bubbly.
Step 7: Garnish and Serve
Remove from the oven and top with the chopped cilantro and extra green onions if desired. Serve warm and enjoy every cheesy, tangy bite!
💡 Expert Tips for Success
🛑 Don’t Skip the Warm-Up: Trying to roll cold tortillas will result in them cracking and splitting open. Always warm them first to make them pliable!
🔥 The Ultimate Shortcut: Pressed for time on a busy weeknight? Skip cooking the chicken breasts and simply use shredded meat from a store-bought rotisserie chicken.
🥣 Grate Fresh Cheese: Always shred your pepper jack and cheddar fresh from a block. Pre-shredded bagged cheese contains anti-caking agents that will prevent it from melting into that perfect gooey texture.
Variations and Substitutions
🌽 Tortilla Swap: Both flour and corn work wonderfully. Corn adds a more traditional, earthy flavor, while flour provides a softer, chewier texture.
🌶️ Turn Up the Heat: If you love spicy food, add fresh diced jalapeños to the chicken filling or use a “hot” variety of green chile enchilada sauce.
🥦 Veggie Boost: Try folding sautéed zucchini, sweet corn, or fresh spinach directly into the creamy chicken filling to sneak in some extra vegetables.
❓ Frequently Asked Questions (FAQs)
What should I serve with Green Chili Chicken Enchiladas?
These pair perfectly with classic Mexican-inspired sides. Serve them alongside a scoop of Mexican rice, refried beans, and a dollop of fresh guacamole or pico de gallo!
How do I store and reheat leftovers?
Refrigerate any leftover enchiladas in an airtight container for up to 4 days. To reheat, cover the dish with foil and bake at 350°F (175°C) until hot throughout, or quickly microwave individual portions for a fast lunch.
Can I freeze these enchiladas?
Yes! You can assemble the unbaked enchiladas in a freezer-safe dish, wrap them tightly, and freeze them for up to 2 months. You can bake them straight from frozen; just be sure to add extra baking time to ensure they heat all the way through the center.
Conclusion
These Green Chili Chicken Enchiladas are exactly what you want in a weeknight dinner—flavorful, comforting, and deeply satisfying. By combining a creamy, zesty filling with soft tortillas and plenty of melted cheese, you get a meal that is easy enough for a busy night and delicious enough to serve to guests. Grab your baking dish, warm those tortillas, and get ready for a plate of pure, quiet comfort!