This 4-ingredient oven baked dessert is the kind of sweet surprise that feels fancy but is secretly so simple. It starts with solid, unthawed frozen ice cream sandwiches layered in a baking dish, and then gets dressed up with just three everyday items. It’s a cozy, Midwestern-style shortcut dessert that lets you spend less time in the kitchen and more time at the table with your family. Perfect for Mother’s Day, weekend celebrations, or anytime you need a sweet treat in a hurry!
Why You’ll Love This Recipe
⏱️ Lightning Fast Prep: Simply unwrap your ice cream sandwiches and layer your ingredients. The oven does all the heavy lifting!
✨ Shortcut Magic: Utilizing pre-made ice cream sandwiches and frozen whipped topping saves you incredible amounts of time and effort.
🍫 Warm & Gooey: The magical combination of baked, cake-like edges and a melty, creamy center is completely irresistible.
🏡 Minimal Ingredients: Relies on just 4 incredibly simple grocery store staples that you might already have on hand.
🎉 Crowd-Pleaser: Guaranteed to deliver a “wow” moment when your family takes their first bite!
Recipe Overview
- Prep time: 10 minutes
- Cook time: 15–20 minutes
- Rest time: 5–10 minutes
- Total time: Approx. 35 minutes
- Yield: 8 Servings
What You’ll Need
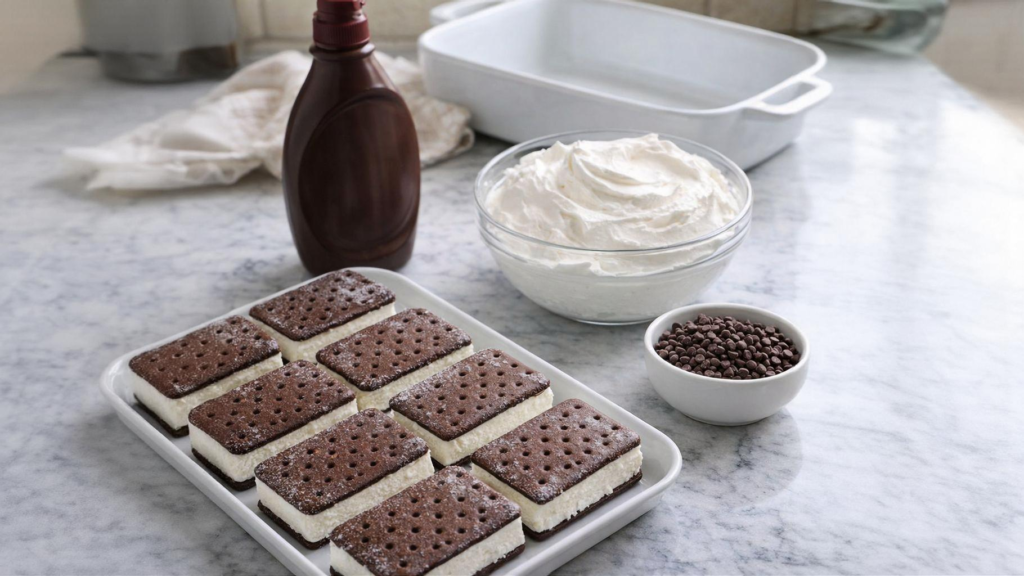
- 12 Frozen ice cream sandwiches: (Standard size, any flavor). They must be solid and unthawed!
- 1 cup Chocolate syrup: (Bottled ice cream topping), divided (½ cup for baking, ½ cup for garnishing).
- 1 tub (8 oz) Frozen whipped topping: Thawed in the fridge so it is easily spreadable.
- 1 cup Mini chocolate chips: (Or regular chocolate chips) to provide that essential chocolatey crunch.
How to Make It (Step-by-Step)
Step 1: Preheat and Prep
Preheat your oven to 350°F (175°C). Lightly grease a 9×13-inch oven-safe baking dish with a little cooking spray or butter so the dessert releases easily.
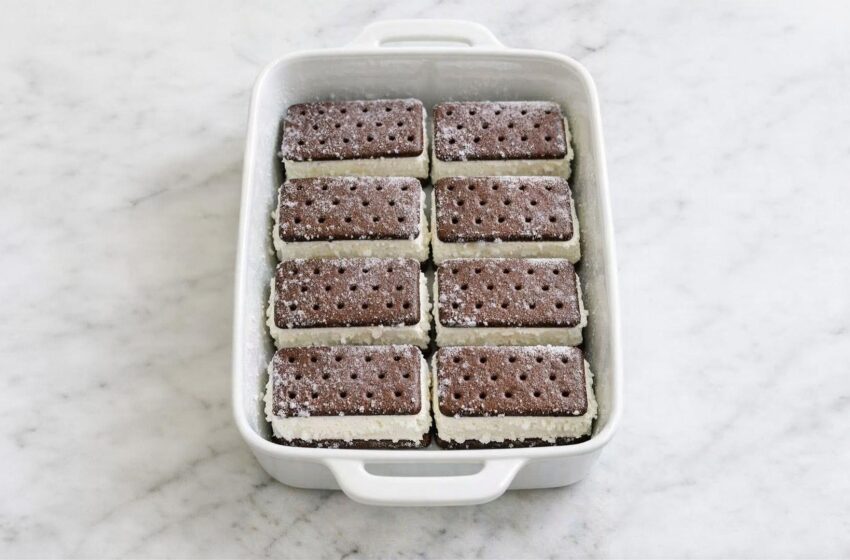
Step 2: Unwrap and Arrange
Working quickly, remove the wrappers from the solid, unthawed ice cream sandwiches. Arrange them in a single layer in the bottom of your baking dish, placing them snugly side by side. (If needed, cut a sandwich in half to fill in any gaps so the bottom of the dish is mostly covered).
Step 3: The First Chocolate Layer
Drizzle about ½ cup of the chocolate syrup evenly over the tops of the ice cream sandwiches, letting it sink down into the little spaces between them.
Step 4: Add the Whipped Topping
Spoon the thawed whipped topping over the chocolate-drizzled ice cream sandwiches. Gently spread it into an even layer, making sure to cover all of the sandwiches completely. This forms a soft, creamy blanket over the top to protect the ice cream.
Step 5: Add the Chips
Sprinkle the mini chocolate chips evenly over the whipped topping so every scoop will have a wonderful crunch.
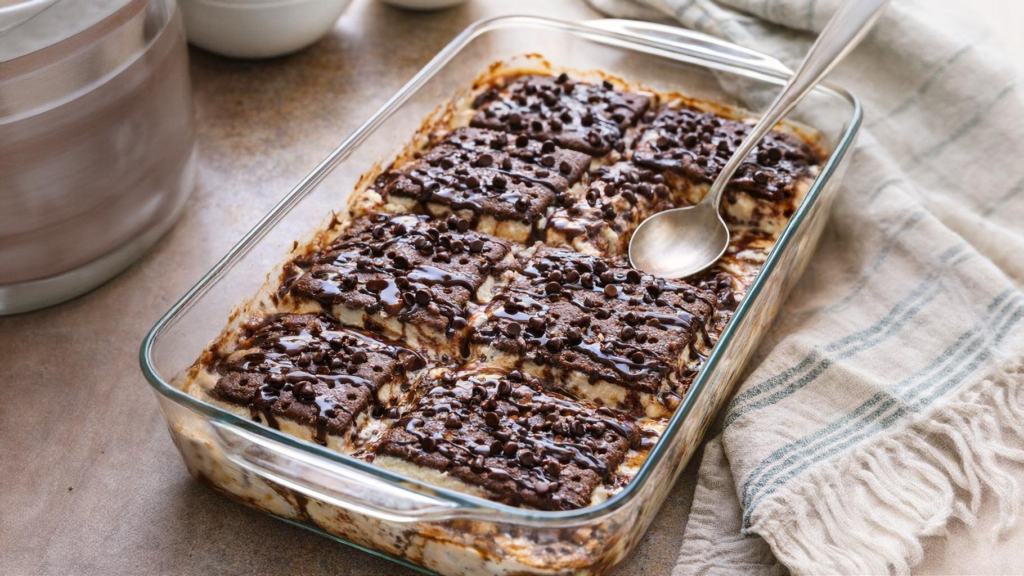
Step 6: Bake
Place the baking dish into the preheated oven and bake for 15–20 minutes.
💡 Crucial Step: Keep a close eye on it near the end of the baking time! You want the whipped topping puffed at the edges and the sandwiches softened, but you do not want them completely melted into soup.
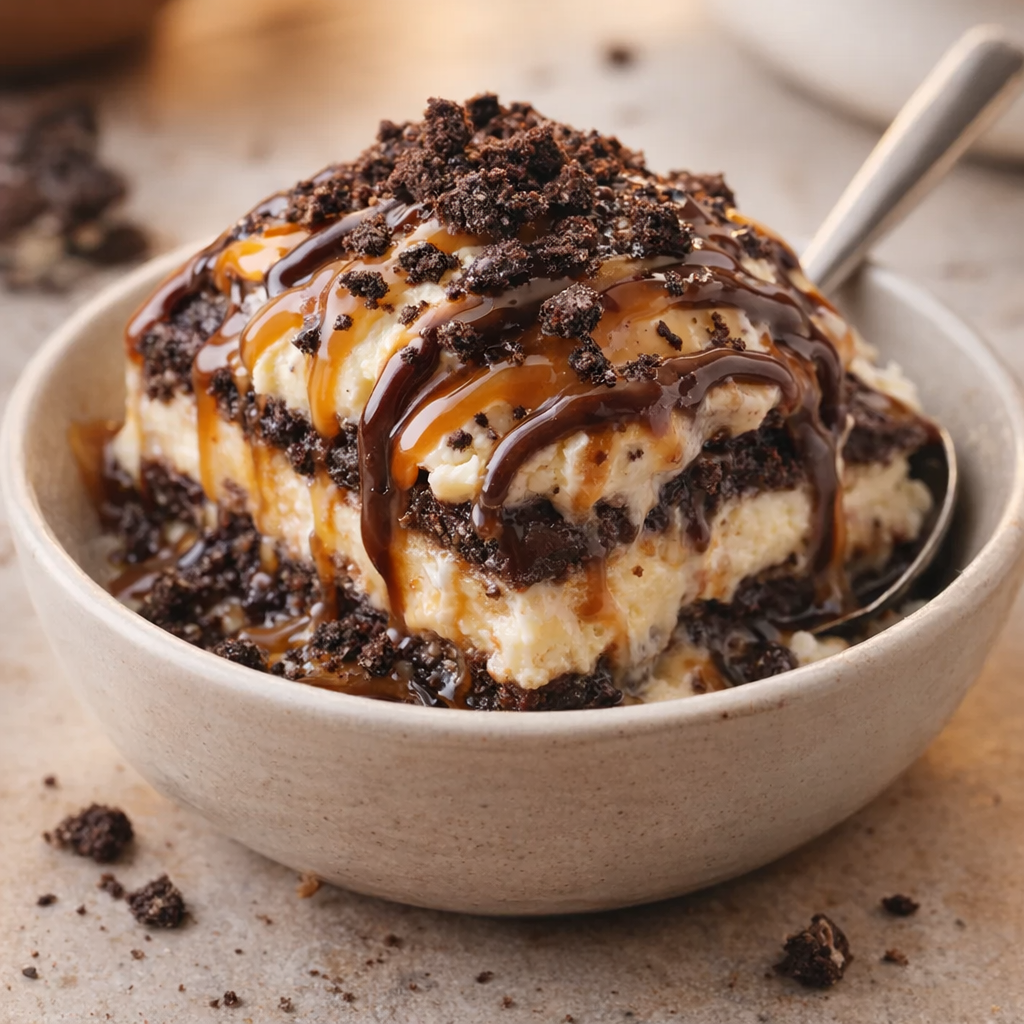
Step 7: Rest, Garnish, and Serve
Carefully remove the dish from the oven and let it rest on the counter for about 5–10 minutes. Drizzle the remaining ½ cup of chocolate syrup over the top in pretty zigzags. Serve warm by scooping it right into bowls!
💡 Expert Tips for Success
🛑 Keep Them Frozen: Keep your ice cream sandwiches frozen solid in the freezer until the very last second. Work quickly when unwrapping and arranging them so they hold their shape in the pan!
🔥 Watch the Oven: Every oven is a little different, so start checking the dessert right at the 15-minute mark. You are looking for a warm, spoonable dessert with some texture left, not a liquid puddle.
🥣 Don’t Skip the Rest: Letting the dessert rest on the counter for 5–10 minutes allows the layers to settle, making it easier to scoop. It also ensures the dessert isn’t too hot for younger kids to eat.
Variations and Substitutions
🍬 Caramel Twist: Replace the chocolate syrup with bottled caramel topping, or use a mix of both for a richer, sundae-style bake.
🍪 Cookie Crunch: If your family loves extra crunch, sprinkle crushed cookies (like chocolate sandwich cookies or graham crackers) over the whipped topping along with the chocolate chips before baking.
🍦 Mix Up the Flavors: Try using different flavors of ice cream sandwiches like chocolate, strawberry, or even cookies-and-cream to mix it up for different holidays and celebrations!
📉 Lighter Option: For a slightly lighter version, use low-fat ice cream sandwiches, light whipped topping, and cut the chocolate chips back to ½ cup.
❓ Frequently Asked Questions (FAQs)
What should I serve with this baked dessert?
Because this dessert is rich and gooey, fresh berries (like sliced strawberries or raspberries) on the side help perfectly balance the sweetness. It also pairs wonderfully with a hot cup of coffee or an ice-cold glass of milk!
Can I make this more kid-friendly for picky eaters?
Absolutely. If you have picky eaters, you can use vanilla-only ice cream sandwiches, skip the chocolate syrup completely, and swap the chocolate chips for bright, colorful rainbow sprinkles.
How do I store and reheat leftovers?
Because this dessert contains dairy that has been warmed, do not let it sit out at room temperature for more than 1–2 hours. Refrigerate any leftovers promptly in an airtight container, and enjoy them within 1–2 days for the best texture. You can reheat leftovers gently in the microwave in short bursts if you like them warm again!
Conclusion
This 4-Ingredient Oven Baked Ice Cream Sandwich Dessert proves that you don’t need a complicated recipe to create a spectacular sweet treat. By utilizing a few smart grocery store shortcuts, you get a warm, gooey, spoonable dessert that feels incredibly special. Grab your baking dish, unwrap those sandwiches, and get ready for a bowl of pure, quiet comfort!