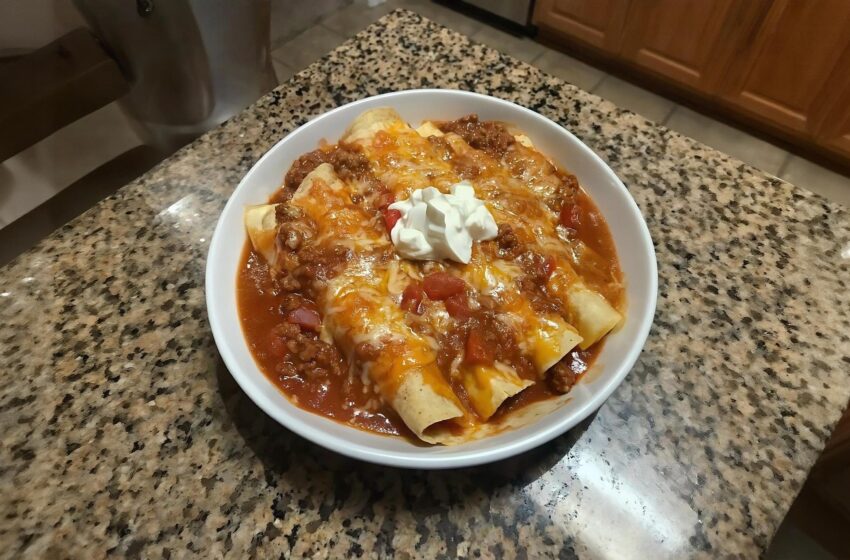
Bold, smoky, and packed with flavor—these rolled red-chile beef and cheese enchiladas bring traditional New Mexican comfort straight to your table! These enchiladas deliver deep, earthy flavor thanks to a homemade red chile sauce made with genuine dried chiles, combined with savory ground beef and creamy cheese. Each bite is hearty, comforting, and richly satisfying—perfect for a home-style meal that’s both elevated and beautifully familiar.
Why You’ll Love This Recipe
🌶️ Authentic Flavor: Using real dried New Mexico chiles gives the sauce a distinctive smokiness and complexity you simply can’t get from a can.
✨ From-Scratch Satisfaction: Making your own sauce elevates the dish beyond store-bought options and gives you absolute control over the flavor.
🧀 Perfectly Cheesy: The combination of savory beef, spicy chile sauce, and crumbled queso fresco ensures a rich, indulgent meal.
🎉 Great for Gatherings: The rolled format is easy to assemble ahead, bake, and serve—ideal for dinner with friends or family!
🥣 Highly Customizable: Easily adjust the spice level, cheese type, or fillings to suit your crowd’s tastes.
Recipe Overview
- Prep time: 30 minutes
- Cook time: 25 minutes
- Total time: 55 minutes
- Yield: 12 Enchiladas (Serves 4–6)
What You’ll Need
For the Red Chile Sauce:
- 2 cups Boiling water: For soaking the dried chiles.
- 1 oz Dried New Mexico chiles: (About 5 chiles), stemmed and seeded.
- 2 Plum tomatoes: Halved.
- 1 small Yellow onion: Quartered.
- 3 Garlic cloves: Left unpeeled for roasting.
- 1 tbsp Apple cider vinegar: To add a subtle, bright tang.
- Seasonings: 2 tsp kosher salt, ½ tsp ground cumin, and ¼ tsp garlic powder.
For the Enchiladas:
- 1 tbsp Canola oil: Plus a little extra for greasing the baking dish.
- 1 lb Lean ground beef: (90% lean works best to prevent a greasy filling).
- Seasonings: 1 tsp kosher salt and 1 tsp ground cumin.
- 12 (5 ½-inch) Corn tortillas: Warmed.
- 12 oz Queso fresco: Crumbled (about 3 cups total).
For Garnish & Serving:
- Fresh cilantro, sliced scallions, and red onion rings.
- Lime wedges and sour cream.
How to Make It (Step-by-Step)
Step 1: Soften the Chiles
Place the stemmed and seeded dried chiles into a heatproof bowl and pour the 2 cups of boiling water over them. Let them soak for about 20 minutes until they are soft and pliable. Reserve exactly 1 cup of the soaking liquid, then drain the rest.
Step 2: Roast the Vegetables
Preheat your broiler (with the oven rack about 6 inches from the heat source). Line a baking sheet with foil and place the tomatoes (cut-side down), quartered onion, and unpeeled garlic cloves on it. Broil for 8–10 minutes until the vegetables are nicely charred. Remove from the oven and carefully peel the skins off the garlic cloves.
Step 3: Blend the Sauce
In a blender, combine the roasted tomatoes, onion, peeled garlic, softened chiles, the reserved 1 cup of chile soaking liquid, apple cider vinegar, salt, cumin, and garlic powder. Blend on high until completely smooth. Set aside.
Step 4: Cook the Beef
Preheat your oven to 350°F (175°C). In a skillet over medium-high heat, warm the canola oil. Add the ground beef, season it with the salt and cumin, and cook for 6–7 minutes until fully browned. Remove from the heat.
Step 5: Assemble the Enchiladas
Lightly grease a 9×13-inch baking dish. Working one tortilla at a time, dip the tortilla into the red chile sauce, allowing any excess to drip off. Place it on a clean surface, fill the center with about ¼ cup of the cooked beef and 2 tablespoons of crumbled queso fresco.
💡 Crucial Step: Always warm your corn tortillas before dipping and rolling them! Cold tortillas will easily crack and tear. Roll them tightly and place them seam-side down into the baking dish.
Step 6: Top and Bake
Once all the tortillas are rolled and in the dish, spoon about ½ cup of the remaining red chile sauce evenly over the top of the enchiladas. Sprinkle with the remaining ½ cup of queso fresco. Bake uncovered for 18–20 minutes until the sauce is bubbling and the cheese is beautifully melted.
Step 7: Garnish and Serve
Remove from the oven and garnish generously with fresh cilantro, sliced scallions, and red onion rings. Serve hot with fresh lime wedges and dollops of sour cream!
💡 Expert Tips for Success
🛑 Don’t Toss the Water: Make sure to save that 1 cup of chile soaking liquid! It contains deep, earthy flavor and is absolutely essential for blending the sauce to the right consistency.
🔥 Roast for Depth: Taking the time to properly char the tomatoes, onion, and unpeeled garlic under the broiler adds an incredible, smoky depth to your homemade sauce that you shouldn’t skip.
🥣 Adjust Sauce Thickness: If your blended sauce feels too thin, you can simmer it in a saucepan for a few extra minutes to reduce it, or add 1 teaspoon of cornstarch mixed with cold water to thicken it up perfectly.
Variations and Substitutions
🌶️ Customize the Heat: For a spicier sauce, add a dried chile de árbol or a canned chipotle pepper to the blender. For a much milder sauce, be sure to meticulously remove every single seed from the dried New Mexico chiles before soaking them!
🌱 Vegetarian Option: Skip the ground beef and substitute it with cooked brown lentils, seasoned black beans, or a hearty mix of sautéed zucchini, corn, and mushrooms.
🌮 Tortilla Swap: While corn tortillas are traditional and hold up much better against the rich sauce, you can use small flour tortillas if your family strongly prefers them.
❓ Frequently Asked Questions (FAQs)
Is this dish very spicy?
It is actually moderately mild by default! Dried New Mexico chiles have a wonderful earthy flavor without an overwhelming amount of heat. However, you can easily adjust the spice level to your exact preference.
Can I make these enchiladas ahead of time?
Yes! You can assemble the enchiladas in the baking dish, cover them tightly, and freeze them unbaked for up to 2 months. You can also make the red chile sauce a few days in advance and keep it in the fridge to save prep time on busy weeknights.
How do I store and reheat leftovers?
Refrigerate any leftover enchiladas in an airtight container for up to 3 days. For the absolute best texture, reheat them in the oven at 350°F (175°C) for about 15–20 minutes until heated through (using the microwave will make the tortillas soggy).