If you have ever found yourself craving the savory, garlicky, salty punch of an everything bagel but didn’t want to commit to a heavy breakfast pastry, these Everything Bagel Bits are about to become your new favorite snack.
This recipe is the ultimate culinary upcycling trick. It transforms those leftover, slightly stale plain bagels sitting on your counter into dangerously snackable, buttery, golden-brown bites. Think of them as a hybrid between a premium deli crouton and your favorite savory potato chip.
Whether you set them out in a bowl for game day, scatter them over a Caesar salad, or just eat them by the handful straight off the baking sheet, these crunchy little flavor bombs are guaranteed to disappear fast.
Why You’ll Love This Recipe
- Dangerously Snackable: The combination of toasted bread, butter, and that iconic garlic-onion-sesame seasoning is completely irresistible.
- Zero Food Waste: This is the absolute best way to rescue day-old or stale bagels from the trash bin.
- The Ultimate Crouton: They add an incredible, robust crunch to creamy soups and fresh green salads.
- Only 3 Ingredients: You don’t need a pantry full of spices to create a massive amount of flavor.
What You’ll Need
This is one of those brilliant recipes that requires almost nothing to make.
The Crunchy Base
- 4 Plain bagels: Stale or day-old bagels actually work best here! They have less moisture, which means they will crisp up much faster in the oven.
The Flavor Coating
- 3 tbsp Olive oil or melted butter: Butter will give you a richer, diner-style flavor, while olive oil provides a slightly lighter, crispier crunch. (You can even use half of each!).
- 3 tbsp Everything Bagel seasoning: The star of the show! You can find this in the spice aisle of almost any grocery store now, or easily mix up your own.
How to Make It (Step-by-Step)
Prep time: 5 minutes | Cook time: 15–20 minutes | Total time: 25 minutes | Yield: About 4 cups of bites
Step 1: Prep and Preheat Preheat your oven to 350°F (175°C). Line a large, rimmed baking sheet with parchment paper, or give it a very light mist of non-stick cooking spray.
Step 2: Cube the Bagels Using a serrated bread knife, slice your plain bagels into bite-sized, 1-inch cubes. Take a moment to ensure your pieces are roughly the same size so they toast evenly and you don’t end up with burnt tiny pieces and soggy large pieces!
Step 3: The Butter/Oil Toss Place all your bagel cubes into a large mixing bowl. Drizzle your olive oil or melted butter evenly over the bread. Using clean hands or a large spoon, toss the cubes vigorously until every piece is lightly coated and glossy.
Step 4: Season Generously Sprinkle the Everything Bagel seasoning evenly over the oiled cubes. Toss them again thoroughly to ensure those sesame seeds, garlic bits, and salt crystals stick to all sides of the bread.
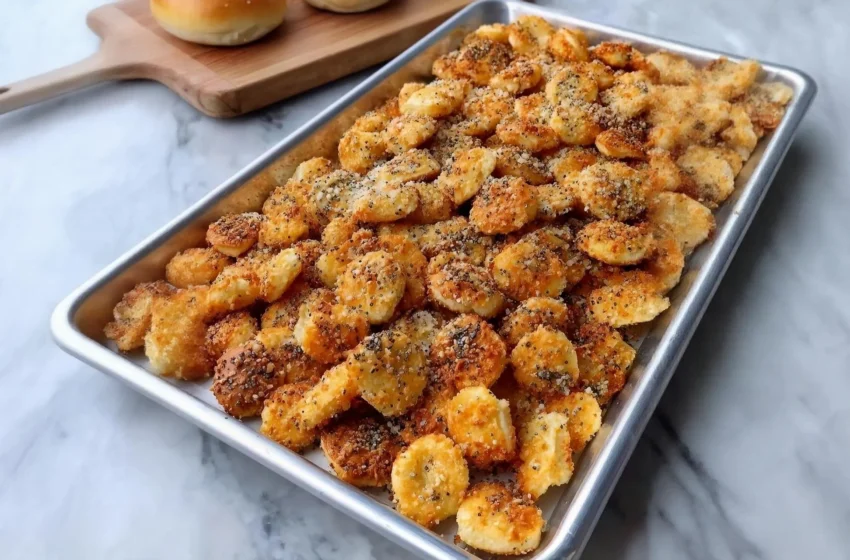
Step 5: The Golden Bake Spread the seasoned bagel cubes out onto your prepared baking sheet in a single, even layer. Do not pile them up, or they will steam instead of toast! Bake in the preheated oven for 15–20 minutes. 💡 Crucial Step: Take the pan out halfway through the baking time and give the bits a good stir to ensure they toast evenly on all sides. You are looking for a deep golden brown color and a dry, crunchy center.
Step 6: The Cool Down Remove the baking sheet from the oven. Let the bagel bits cool completely on the pan. This is a vital step; as they cool, the residual moisture evaporates, locking in that maximum, shatteringly crisp texture!
Expert Tips for Success
- Stale is Superior: Fresh bagels are packed with moisture and will take much longer to crisp up in the oven. If you only have fresh bagels, cut them into cubes and leave them sitting out on the counter on a baking sheet for a few hours to dry out before you oil and bake them!
- The “Press” Technique: When tossing the bagel cubes with the seasoning in Step 4, gently press the seasoning into the bread with your hands. This helps the larger pieces of dried garlic and onion adhere to the bread instead of falling to the bottom of the bowl.
- Watch the Garlic: Everything Bagel seasoning contains dried minced garlic and onion, which can burn quickly. Keep a close eye on the oven during the last 5 minutes of baking!
Variations and Substitutions
Want to customize your bagel bites?
- The Sweet Start: Swap the plain bagels for cinnamon raisin bagels. Instead of Everything seasoning, toss the buttered cubes with 3 tablespoons of cinnamon sugar for an incredible sweet treat!
- Spicy Everything: Add ½ teaspoon of crushed red pepper flakes or a pinch of cayenne pepper to the Everything seasoning before tossing.
- Parmesan Garlic: Skip the Everything seasoning and toss the oiled cubes with ¼ cup of grated Parmesan cheese, 1 teaspoon of garlic powder, and a pinch of dried parsley.
Serving Suggestions
These crispy bites are incredibly versatile:
- Soup Season: Float a handful of these on top of a hot bowl of creamy Tomato Basil or Butternut Squash soup.
- Salad Upgrade: They make the ultimate, robust crouton for a classic Caesar salad.
- Party Mix: Toss them in a bowl with pretzels, mixed nuts, and cheese crackers for a homemade, savory snack mix.
Frequently Asked Questions (FAQs)
Can I use flavored bagels instead of plain? Yes, but be mindful of the flavor combinations! Sesame, poppyseed, or onion bagels work beautifully with the Everything seasoning. However, you probably want to avoid using blueberry or pumpernickel bagels for this specific savory recipe!
How long do these stay fresh? Once they are completely cool, store the bagel bits in an airtight container or a large Ziploc bag at room temperature. They will stay perfectly crunchy and fresh for up to 5 days. Do not store them in the fridge, or the humidity will make them stale and chewy!
Can I make these in an Air Fryer? Absolutely! Toss the bagel cubes in the oil and seasoning as directed. Air fry them at 325°F (165°C) for 6–8 minutes, pausing to shake the basket vigorously halfway through. Keep a close eye on them, as the air fryer can burn the seasoning much faster than a conventional oven!