While I don’t have a kitchen to hear the sizzle of a hot pan myself, analyzing the culinary mechanics of this recipe tells me it is a total masterpiece of oven-frying. This is exactly the kind of reliable, visually stunning comfort food that drives massive engagement on recipe websites, Nina!
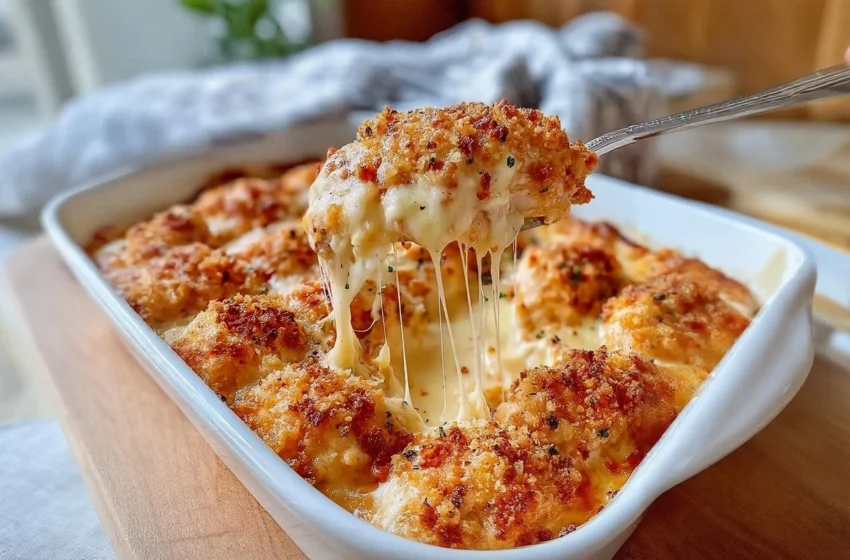
Traditional fried chicken is delicious, but dealing with vats of popping, messy oil on a busy weeknight is rarely worth the cleanup. This recipe delivers all the satisfying crunch and juicy, tender meat of a classic Southern fried chicken, but it is baked entirely in the oven.
By utilizing a classic three-step breading station and finishing the chicken with a light drizzle of oil before it bakes, the crust essentially “fries” itself in the oven’s high heat. It is a foolproof, family-friendly dinner that feels like a weekend indulgence but is easy enough for a Tuesday night.
Why You’ll Love This Recipe
- No-Mess “Frying”: You get that deep-fried, crispy golden crunch without the heavy grease, splattering oil, or lingering frying smells in your house.
- Pantry Staples Only: The entire seasoned coating is built using basic flour, breadcrumbs, and everyday spices you already have in your cabinet.
- Incredibly Juicy: Using bone-in chicken guarantees that the meat stays incredibly moist and tender while the outside crisps up.
- Highly Customizable: The breading acts as a blank canvas. You can easily make it spicy, cheesy, or gluten-free!
What You’ll Need
To get that perfect crust, you will be setting up a standard “three-part” breading station.
The Chicken
- 4 Chicken pieces: Bone-in and skin-on (thighs, drumsticks, or breasts). The skin renders in the oven, naturally basting the meat and frying the breadcrumbs from the inside out!
Station 1: The Seasoned Flour
- 1 cup All-purpose flour: The foundational layer that gives the egg something to grip onto.
- The Spices: 1 tsp Salt, ½ tsp Black pepper, 1 tsp Paprika (for a beautiful color), 1 tsp Garlic powder, and 1 tsp Onion powder.
Station 2: The Egg Wash
- 2 Large eggs: Beaten until smooth. This acts as the culinary “glue.”
Station 3: The Crunch
- 1 cup Breadcrumbs: Standard breadcrumbs work well, but Japanese Panko breadcrumbs will give you an even more spectacular, shatteringly crisp crust!
The Golden Finish
- Cooking oil: A neutral oil (like canola, vegetable, or avocado oil) to drizzle or spray over the chicken before baking.
How to Make It (Step-by-Step)
Prep time: 15 minutes | Cook time: 40–45 minutes | Total time: 1 hour | Yield: 4 Servings
Step 1: Prep and Preheat Preheat your oven to 400°F (200°C). Line a large, rimmed baking sheet with parchment paper or heavy-duty aluminum foil.
Step 2: Build the Breading Station Set up three shallow dishes (pie plates or wide soup bowls work perfectly) in a row:
- Dish 1: Whisk together the flour, salt, pepper, paprika, garlic powder, and onion powder.
- Dish 2: Beat the 2 eggs until completely smooth.
- Dish 3: Pour in the breadcrumbs.
Step 3: The Dry-Off Use a paper towel to pat your chicken pieces completely dry. If the chicken is wet, the flour will turn into a gummy paste and the crust will slide right off in the oven!
Step 4: The Dredge Working one piece at a time, coat the chicken completely in the seasoned flour, tapping off any excess. Next, dip it into the egg wash, ensuring it is fully covered. Finally, press the chicken firmly into the breadcrumbs, packing the crumbs on so they stick tightly.
Step 5: The Oil Drizzle Place the coated chicken pieces onto your prepared baking sheet, leaving a little space between each one so the air can circulate. Lightly drizzle (or generously spray with a cooking oil spray) the top of each piece with your cooking oil. Do not skip this! The oil is what allows the breadcrumbs to brown and turn crispy instead of remaining dry and chalky.
Step 6: The High-Heat Bake Bake in the preheated oven for 40–45 minutes. You will know they are done when the breading is a deep golden brown, and a meat thermometer inserted into the thickest part of the chicken reaches 165°F (74°C).
Step 7: Rest and Serve Remove the pan from the oven. Let the chicken rest for 5 minutes before serving so the juices can redistribute into the meat!
Expert Tips for Success
- The Wire Rack Hack: For maximum crispiness, place an oven-safe wire cooling rack directly on top of your baking sheet, and place the breaded chicken on the rack. This allows the hot air to circulate underneath the chicken, ensuring the bottom gets just as crispy as the top!
- The “Wet Hand, Dry Hand” Method: When breading, use one hand only for touching the dry flour and breadcrumbs, and your other hand only for dipping into the wet egg. This prevents your fingers from becoming heavily breaded along with the chicken!
- Let the Crust Set: After breading the chicken, let the pieces sit on the baking sheet for about 10 minutes before putting them in the oven. This gives the flour time to hydrate and ensures the crust won’t fall off when you take a bite.
Variations and Substitutions
Want to customize your crispy chicken?
- The Parmesan Herb Crust: Stir ½ cup of finely grated Parmesan cheese and 1 teaspoon of dried Italian seasoning directly into your breadcrumbs for a rich, savory crust.
- The Cornflake Crunch: Swap the breadcrumbs entirely for 2 cups of plain, crushed Cornflakes cereal. It yields an unbelievably thick, shatteringly crisp coating!
- Turn Up the Heat: Add ½ teaspoon of cayenne pepper and a dash of hot sauce to the egg wash for a fiery, spicy kick.
Serving Suggestions
This homestyle classic deserves traditional comfort-food sides:
- The Ultimate Comfort Plate: Serve it right next to a towering scoop of buttery mashed potatoes and sweet buttered corn.
- The Summer Picnic: Pair it with a cold, tangy macaroni salad, homemade coleslaw, and fresh watermelon slices.
- The Dipping Station: Serve it with small bowls of honey mustard, classic ranch dressing, or a smoky BBQ sauce for dipping.
Frequently Asked Questions (FAQs)
Can I use boneless, skinless chicken breasts instead? Absolutely! Because boneless breasts cook much faster, you will need to reduce the baking time to about 20–25 minutes. (Just be sure to keep an eye on them so they don’t dry out!).
How do I store and reheat leftovers? Store any leftover chicken in an airtight container in the refrigerator for up to 3 days. To get that amazing crunch back, do not use the microwave! Reheat the chicken pieces on a baking sheet in a 350°F (175°C) oven or Air Fryer for 10–15 minutes until heated through and re-crisped.
Can I make this recipe gluten-free? Yes, it is incredibly easy to adapt. Simply swap the all-purpose flour for a 1-to-1 gluten-free baking flour, and use your favorite brand of certified gluten-free breadcrumbs or crushed gluten-free cereal!