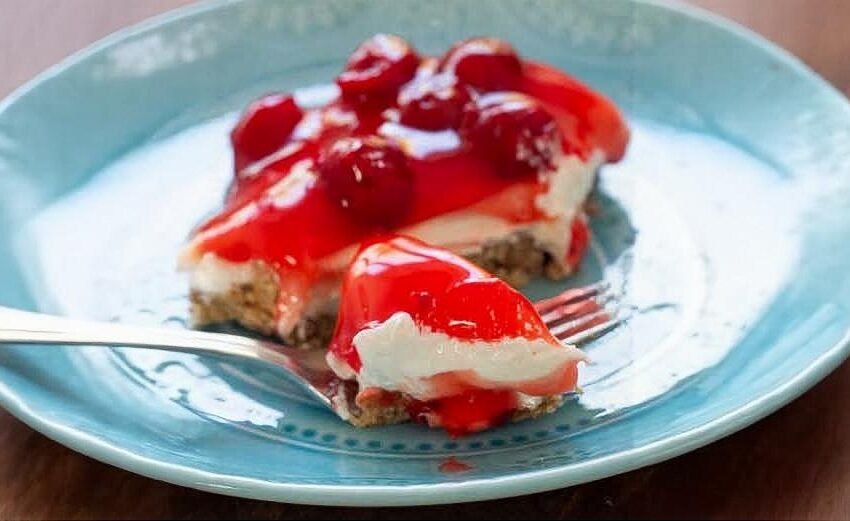
This dessert is made up of just three beautiful layers, requires absolutely no oven time, and yet the end result is a sweet and creamy treat that tastes totally indulgent. It’s the perfect sweet treat to pull together when you are craving cheesecake but don’t want to deal with water baths or baking times!
It truly has it all—a buttery, crunchy pecan base, an irresistible layer of silky cheesecake filling, and the sweet, syrupy bite of cherry pie filling. While it does take some chilling time in the fridge to set up properly, it takes very little effort to put together. When it comes to dessert, that is always the best kind of news!
Why You’ll Love This Recipe
- Completely No-Bake: Save your oven space! You don’t have to bake the crust or the filling.
- Only 3 Layers: It is incredibly simple to assemble, making it practically foolproof.
- Perfectly Balanced: The tangy cream cheese filling perfectly cuts through the sweet, syrupy cherry topping so it isn’t overly sugary.
- Make-Ahead Magic: It actually slices much better if you make it the night before, making it the ultimate stress-free potluck dessert.
What You’ll Need
To get the smoothest, fluffiest filling, make sure you take your cream cheese out of the refrigerator a couple of hours before you plan to start mixing so it is completely softened!
- 2 cups Graham cracker crumbs: About 2 standard sleeves, crushed finely.
- 1 ½ cups Pecans: Finely chopped to give the crust a fantastic, nutty crunch.
- 1 cup (2 sticks) Unsalted butter: Melted, to bind the crust together.
- 2 blocks (8 oz each) Cream cheese: Softened to room temperature.
- 1 tsp Vanilla extract: For that classic bakery flavor.
- 4 cups Powdered sugar: Sweetens the cheesecake layer beautifully without any graininess.
- 1 container (8 oz) Frozen whipped topping: Thawed, to make the filling perfectly light and airy.
- 42 oz Cherry pie filling: (About two standard 21-ounce cans).
How to Make It (Step-by-Step)
Prep time: 10 minutes | Chill time: 2 hours | Total time: 2 hours 10 minutes | Yield: 12 Servings
Step 1: The Buttery Crust
In a large mixing bowl, combine the graham cracker crumbs and the finely chopped pecans. Pour in the melted butter and stir everything together until the mixture resembles damp sand.
Step 2: Press and Chill
Press the crumb mixture firmly into the bottom of a 9×13-inch baking dish.
💡 Crucial Step: Use the flat bottom of a drinking glass or measuring cup to pack the crust down as tightly as possible! Place the dish in the freezer to set while you make the filling.
Step 3: Whip the Cream Cheese
In a large bowl, use a hand mixer to beat the softened cream cheese until it is completely smooth and free of lumps. Add the vanilla extract and the powdered sugar, and continue beating until the mixture is light and creamy.
Step 4: Fold in the Fluff
Using a rubber spatula, gently fold the thawed whipped topping into the cream cheese mixture until no white streaks remain. (Do not use the electric mixer for this part, or you will deflate the fluffy topping!)
Step 5: Layer the Filling
Remove your crust from the freezer. Dollop the fluffy cream cheese mixture over the chilled crust, using your spatula to spread it into a smooth, even layer.
Step 6: The Cherry Topping
Spoon the cherry pie filling evenly over the top of the cream cheese layer, spreading the cherries out so every slice gets plenty of fruit.
Step 7: Chill and Serve
Cover the baking dish tightly with plastic wrap or foil. Refrigerate for at least 2 hours (or overnight!) to allow the layers to fully set up before slicing. Serve chilled!
💡 Expert Tips for Success
- Room Temperature Cream Cheese: This is non-negotiable! If your cream cheese is even slightly cold, it will leave tiny, stubborn lumps in your beautiful filling.
- Thaw the Topping Correctly: Let your frozen whipped topping thaw in the refrigerator overnight. If you try to microwave it to thaw it quickly, it will turn into a runny liquid!
- Clean Slices: For bakery-worthy, perfect squares, wipe your knife clean with a damp paper towel between every single slice you make.
Variations and Substitutions
- Swap the Fruit: Not a huge cherry fan? This exact recipe works perfectly with canned blueberry, strawberry, or even spiced apple pie filling!
- The Nut-Free Crust: If you have nut allergies in the family, simply omit the pecans and add an extra ½ cup of graham cracker crumbs to compensate.
- The Oreo Twist: Swap the graham crackers for crushed Golden Oreos or classic chocolate Oreos for a totally different, incredibly decadent crust flavor.
Serving Suggestions
- The Potluck Star: Serve this directly from the 9×13 pan at your next barbecue, church supper, or family reunion.
- The Holiday Table: The bright, vibrant red cherries make this a stunning addition to a holiday dessert spread.
- The Extra Garnish: Top each individual slice with a tiny extra dollop of whipped cream and a fresh sprig of mint right before serving for a gourmet presentation.
Frequently Asked Questions (FAQs)
Can I make this dessert ahead of time?
Yes! This is the ultimate make-ahead dessert. It actually sets up much firmer and slices much cleaner if you let it chill overnight in the refrigerator.
How do I store leftovers?
Keep the baking dish tightly covered with plastic wrap or a secure lid in the refrigerator for up to 4 days. The graham cracker crust will soften slightly the longer it sits, but it will still taste absolutely delicious!