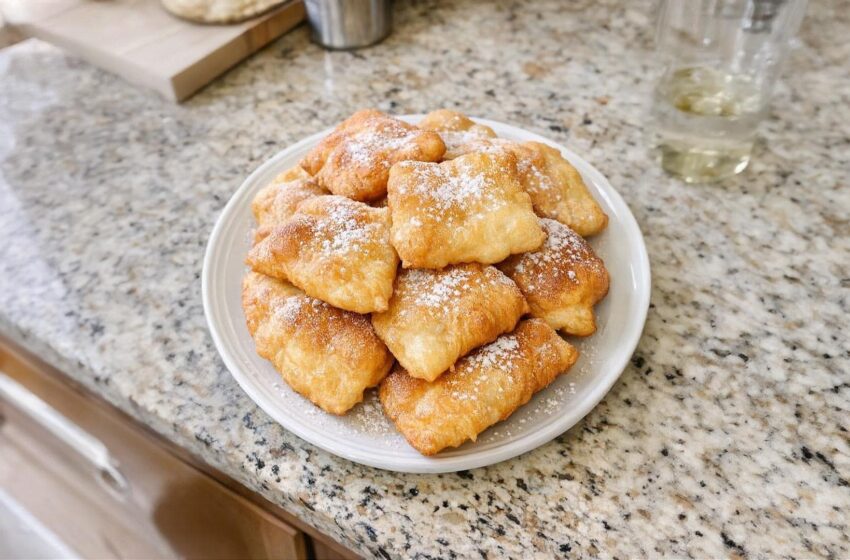
There is a profound beauty in recipes that ask for almost nothing and deliver pure comfort. This Southern staple was born during the Great Depression when families had to turn a handful of flour and a bit of fat into a meal that could stretch to feed everyone.
The secret to this dough is the gentle touch. Because we are using baking powder for lift, you want to knead the dough just enough to bring it together—overworking it will result in a tough cracker, but a light hand yields a pillowy, puffed bread with shatteringly crisp edges. It’s a bit of culinary history that tastes like a cross between a biscuit and a funnel cake.
Why You’ll Love This Recipe
- Pure Pantry Magic: It uses five basic staples you likely have in your kitchen right now. No yeast, no waiting for dough to rise.
- Versatile Canvas: It can lean sweet (with honey and cinnamon) or savory (as a side for beans or soup) depending on what you have on hand.
- The “Fair Food” Factor: It has that nostalgic, golden-fried aroma that instantly brings everyone to the kitchen.
- Fast and Forgiving: From mixing to frying, you can have a hot batch of bread on the table in under 15 minutes.
What You’ll Need
To get the most authentic Southern flavor, using lard or bacon drippings for frying adds a savory depth that neutral oil can’t match!
- 2 cups All-purpose flour: The sturdy base of our bread.
- 2 tsp Baking powder: This provides the “puff” and light texture.
- 1 tsp Salt: Essential to bring out the flavor of the fried flour.
- ¾ to 1 cup Water: Use just enough to form a soft, tacky dough.
- ⅓ cup Oil, Lard, or Bacon Grease: For frying. (Cast iron skillets are highly recommended!).
How to Make It (Step-by-Step)
Prep time: 5 minutes | Cook time: 10 minutes | Total time: 15 minutes | Yield: 8–10 pieces
Step 1: Whisk the Dry Base
In a medium bowl, whisk together the flour, baking powder, and salt. Ensuring the baking powder is evenly distributed is the key to getting an even rise in the hot oil.
Step 2: Form the “Shaggy” Dough
Start by adding ¾ cup of water. Stir with a spoon until a shaggy dough forms. If it’s still crumbly, add more water one tablespoon at a time. You want a dough that is soft and slightly tacky to the touch, but not wet or sticky.
Step 3: The Gentle Knead
Turn the dough onto a lightly floured surface. Knead it only 6 to 8 times.
💡 Crucial Step: Stop as soon as the dough forms a smooth ball. If you over-knead, you develop too much gluten, which makes the fried dough tough instead of tender.
Step 4: Shape and Cut
Pat the dough out with your hands (no rolling pin needed!) until it is about ¼-inch thick. Cut into 8 to 10 rustic pieces—squares, triangles, or rounds all work perfectly.
Step 5: The Shimmer Test
Heat your oil or lard in a heavy skillet over medium-high heat. To test if it’s ready, drop a tiny pinch of dough into the fat; it should sizzle immediately but not smoke.
Step 6: The Golden Fry
Carefully lay a few pieces of dough into the hot fat. Fry the first side for 2–3 minutes until puffed and golden brown. Flip and fry the second side for 1–2 minutes.
Step 7: Drain and Serve
Transfer the golden rounds to a plate lined with paper towels to drain. Serve while they are still steaming hot!
💡 Expert Tips for Success
- Temperature Control: If the dough browns instantly but remains raw in the middle, your oil is too hot. Lower the heat slightly; you want a steady sizzle, not a violent bubble.
- The “Puff” Secret: Pricking the dough with a fork once or twice before frying can prevent large air bubbles from forming, or you can leave them as-is for a more rustic, “pillowy” look.
- Fresh is Best: These are at their absolute peak within the first hour of frying. If you must reheat them, use a dry skillet or a toaster oven to bring back the crispness—the microwave will make them rubbery.
Variations and Substitutions
- The Richer Version: Swap the water for buttermilk. The acidity in the buttermilk reacts with the baking powder to create an even lighter, more tender “hoe-cake” style bread.
- The Sweet Tooth: Stir 1 tablespoon of sugar into the dry ingredients and dust the finished bread with powdered sugar and cinnamon.
- Savory Herb: Fold in a teaspoon of dried rosemary or some finely chopped green onions for a bread that pairs perfectly with a bowl of chili or beef stew.
Serving Suggestions
- The Sweet Morning: Drizzle with honey, sorghum, or maple syrup alongside a hot cup of coffee.
- The Southern Supper: Serve as a side for a “mess o’ greens” (collards or mustard greens) and a pot of pinto beans.
- The Rustic Appetizer: Top a warm round with a dollop of pimento cheese or a thin slice of salty country ham.
Frequently Asked Questions (FAQs)
Can I use self-rising flour?
Yes! If you use self-rising flour, you can omit the baking powder and salt entirely, making this a 3-ingredient recipe!
How do I store leftovers?
Keep them in an airtight container at room temperature for up to 24 hours. Reheat in a dry skillet over medium heat for 1 minute per side to restore the “crunch.”
Can I make the dough in advance?
It’s best to fry the dough immediately after mixing so the baking powder is at its most active. If you must wait, keep the dough covered in the fridge for no more than 2 hours.