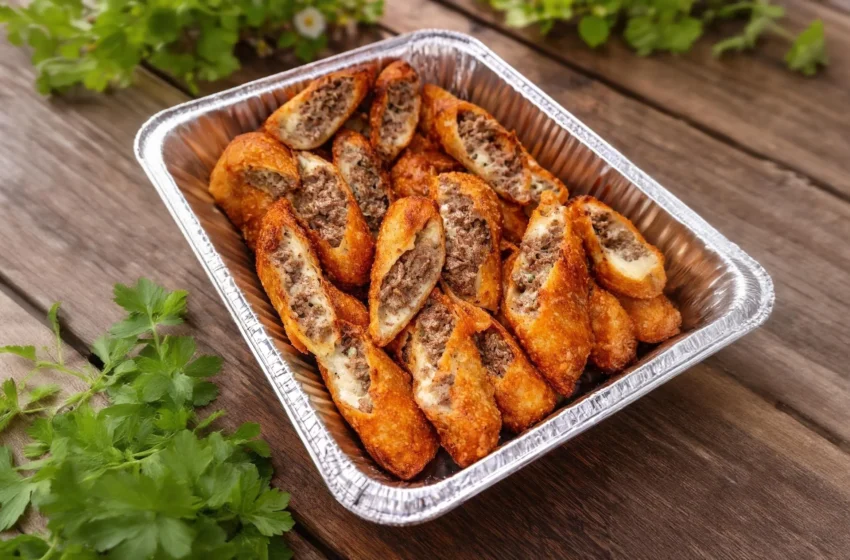
Let’s be honest: anything stuffed with savory ground beef and molten cheese, then fried until it is shatteringly crisp, is guaranteed to be a massive hit. These Crispy Beef and Cheese Stuffed Rolls are the ultimate party food, bridging the gap between a classic crispy egg roll and a savory, cheesy empanada.
Whether you are hosting a packed game-day watch party, looking for a heavy appetizer to impress your friends, or just craving some serious weekend comfort food, these golden rolls hit every single mark.
The seasoned beef is packed with aromatic spices like paprika and cumin, and the gooey melted mozzarella inside provides the perfect cheese-pull with every bite. The best part? Working with store-bought egg roll wrappers makes these surprisingly fast and easy to assemble right in your own kitchen!
Why You’ll Love This Recipe
- The Ultimate Crunch: Wrapping the savory filling in thin spring roll or egg roll wrappers guarantees a beautiful, flaky, golden-brown crust.
- Crowd-Pleasing Flavors: Beef and cheese is a universally loved combination that appeals to both kids and adults.
- Make-Ahead Friendly: You can roll an entire batch of these ahead of time and keep them in the fridge until your guests arrive.
- Customizable: You can easily swap the spices, the cheese, or even the meat to create your own signature flavor profile.
What You’ll Need
This recipe uses simple, accessible ingredients to build deep, savory flavor.
The Savory Filling
- 1 lb (450 g) Ground beef: An 80/20 blend works well, but lean ground beef is also great since you will be adding cheese!
- 1 Small onion: Finely chopped.
- 2 cloves Garlic: Freshly minced.
- The Spices: 1 tsp Salt, ½ tsp Black pepper, ½ tsp Paprika, and ½ tsp Ground cumin (the cumin gives it a wonderful, warm, slightly earthy flavor!).
- 1 cup Shredded cheese: Mozzarella gives you the best stretchy cheese pull, while Cheddar offers a sharper, bolder flavor. (A 50/50 mix of both is incredible!)
The Wrappers & Frying
- 12 Spring roll or Egg roll wrappers: Found in the refrigerated produce section of most grocery stores.
- 1 Large egg: Beaten, to use as the “glue” to seal your wrappers.
- Vegetable oil: Or canola, peanut, or any neutral, high-heat oil for frying.
How to Make It (Step-by-Step)
Prep time: 20 minutes | Cook time: 15 minutes | Total time: 35 minutes | Yield: 12 Rolls
Step 1: Brown the Beef Heat a large skillet over medium-high heat. Add your ground beef, using a wooden spoon to break it up into small, even crumbles as it cooks. Once the beef is mostly browned, drain any excess grease from the pan.
Step 2: Aromatics and Spices Lower the heat to medium. Add your finely chopped onion to the beef and cook for 2–3 minutes until the onion is soft and translucent. Stir in the minced garlic, salt, black pepper, paprika, and cumin. Cook for just 1 more minute until the garlic is beautifully fragrant. Remove the skillet from the heat.
Step 3: The Crucial Cool-Down Let the beef mixture cool down for about 10 minutes. Do not add the cheese while the beef is piping hot! If you do, the cheese will melt into the pan and become a greasy mess instead of staying gooey inside the roll. Once the beef is warm (but not hot), stir in your shredded cheese.
Step 4: The Envelope Fold Lay one wrapper flat on a clean, dry surface with one corner pointing directly at you (like a diamond shape). Place 2–3 tablespoons of your beef and cheese mixture on the lower half of the diamond. Fold the bottom corner up tightly over the filling. Fold the left and right corners in toward the center (like an envelope). Roll it tightly upward.
Step 5: Seal the Deal Before making the final roll, use your finger or a pastry brush to dab a little bit of your beaten egg onto the top corner of the wrapper. Finish rolling, pressing gently to seal it completely. Repeat until all 12 rolls are assembled!
Step 6: The Golden Fry In a deep, heavy-bottomed skillet or Dutch oven, heat about 1½ inches of vegetable oil to 350°F (175°C). (If you don’t have a thermometer, drop a tiny piece of wrapper into the oil; if it sizzles and floats immediately, it’s ready). Carefully lower the rolls into the hot oil in batches of 3 or 4 so you don’t crowd the pan. Fry for 3–4 minutes, using tongs to turn them occasionally, until they are deep golden brown and crispy on all sides.
Step 7: Drain and Serve Remove the rolls with tongs or a slotted spoon and place them on a wire rack or a paper towel-lined plate to drain any excess oil. Serve them while they are piping hot!
Expert Tips for Success
- Roll Them Tightly: Air pockets are the enemy of a good egg roll. Wrap the dough as tightly around the meat as you can without tearing it to prevent the rolls from absorbing too much oil while frying.
- Seal Completely: Ensure every edge is sealed shut with the egg wash. If there is a gap, the molten cheese will leak out into the hot oil and cause dangerous splattering!
- Keep Wrappers Moist: Egg roll wrappers dry out and crack very quickly. While you are assembling the rolls, keep the unused wrappers covered with a slightly damp paper towel.
Variations and Substitutions
Want to change up the flavor profile?
- The Taco Roll: Swap the paprika and cumin for 2 tablespoons of your favorite taco seasoning. Use a Mexican cheese blend, and serve with salsa and sour cream!
- Philly Cheesesteak Style: Omit the cumin and paprika. Add finely diced green bell peppers to the onions, and use provolone cheese instead of cheddar.
- The Baked Option (Lighter!): Don’t want to deep fry? Place the assembled rolls on a parchment-lined baking sheet. Brush them generously on all sides with vegetable oil or melted butter. Bake at 400°F (200°C) for 18–20 minutes, flipping them halfway through, until crispy and golden.
Serving Suggestions
These savory rolls are practically begging for a good dipping sauce!
- Sweet and Spicy: A side of Thai Sweet Chili Sauce offers a brilliant, sweet contrast to the savory beef and cumin.
- Creamy & Cooling: Serve with a side of creamy Ranch dressing or a zesty Avocado Crema to cool down the hot cheese.
- The Ultimate Platter: Serve them alongside a warm bowl of Queso dip for a truly decadent, double-cheese appetizer spread.
Frequently Asked Questions (FAQs)
Can I make these in an Air Fryer? Absolutely! Brush the assembled rolls lightly with oil (or spray them generously with cooking spray). Place them in the air fryer basket in a single layer, making sure they don’t touch. Air fry at 380°F (190°C) for 8–10 minutes, flipping them halfway, until they are golden and crispy.
Can I freeze these stuffed rolls? Yes! You can freeze them un-fried. Assemble the rolls, place them on a baking sheet in the freezer until solid, and then transfer them to a freezer-safe bag for up to 2 months. You can fry them straight from frozen; just add an extra 1–2 minutes to the frying time to ensure the beef and cheese are heated through.
Why did my rolls turn out greasy and soggy? This is almost always an oil temperature issue. If your oil is too cold (below 325°F), the wrapper will soak up the oil like a sponge instead of instantly searing and crisping. Always let the oil come back up to temperature between batches!