Lunch Lady Brownies are the ultimate nostalgic comfort food—fudgy, chewy, brimming with rich chocolate flavor, and completely delectable. They capture the magic of the beloved squares served for school lunch dessert, but this premium handcrafted version is even better!
Every bite delivers a moist, fluffy interior capped with a signature glossy chocolate frosting that elevates them to the next level. They are incredibly easy to bake, store beautifully in an airtight container, and are the perfect, crowd-pleasing treat to bring to family gatherings, bake sales, or weekend parties. Just be prepared for them to disappear fast!
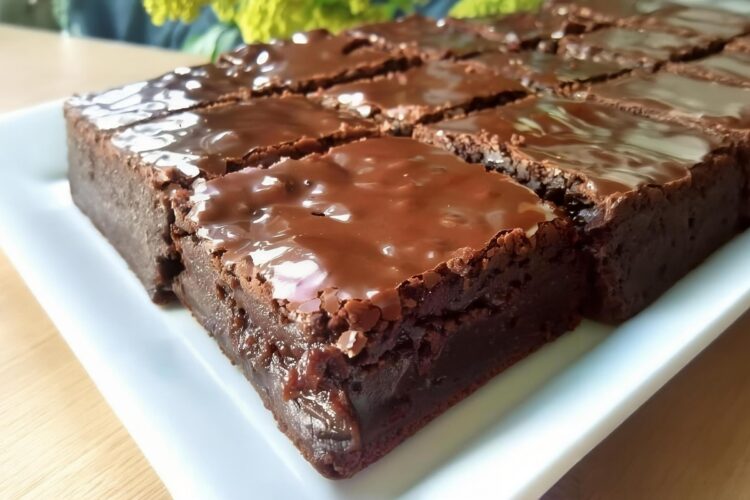
📸 The Texture and Structure Dynamics
Crafting the perfect old-school lunch lady brownie relies on balancing a tender crumb with a velvety, smooth fudge frosting:
- Melted Butter & Creamed Sugar (The Fudgy Core): Using melted butter instead of softened butter ensures a tight, chewy, and dense interior matrix rather than a dry, cake-like texture.
- Cake Flour (The Tender Binder): The lower protein content in cake flour guarantees an incredibly soft, delicate crumb that melts in your mouth.
- Five Whole Eggs (The Fluffy Lift): Eggs provide the primary structural lift and a rich, custard-like moisture that keeps the brownies from drying out.
- Glossy Cocoa Icing (The Sweet Crown): Whipping softened butter, milk, and powdered sugar builds a smooth, spreadable shield that locks in internal moisture while adding a rich layer of sweetness.
Recipe Overview
- Prep time: 15 minutes
- Bake time: 25 minutes
- Cooling time (Inactive): 30 minutes
- Total time: ~1 hour
- Yield: 12 to 15 Generous Squares
What You’ll Need
For the Brownie Batter:
- 2 cups Cake flour
- 1 ½ cups Granulated sugar
- 1 cup Unsalted butter, melted
- 5 Large eggs, room temperature
- 1 cup Unsweetened cocoa powder
- 2 tablespoons Pure vanilla extract
For the Glossy Chocolate Frosting:
- ½ cup Unsalted butter, thoroughly softened
- ½ cup Unsweetened cocoa powder
- 3 cups Powdered sugar (confectioners’ sugar)
- ½ cup Whole milk (warmed slightly to prevent seizing)
Step-by-Step Instructions
Step 1: Prep the Pan and Ignite the Oven
Preheat your oven to 180°C (350°F). Line a 9×13-inch baking dish cleanly with a sheet of aluminum foil, leaving an inch of overhang on the sides to act as a sling. Lightly spray the foil with nonstick baking spray to assist with cleanup later.
Step 2: Cream the Liquid Foundation
In the bowl of an electric stand mixer fitted with the paddle attachment (or using a large mixing bowl with a hand mixer), combine your 1 cup of melted butter and 1 ½ cups of granulated sugar. Cream them together on medium speed until well combined. Drop in the 2 tablespoons of pure vanilla extract and the 5 large eggs one at a time, mixing on low speed just until uniformly incorporated.
Step 3: Sift and Beat the Starches
Turn off the mixer and add your 2 cups of cake flour and 1 cup of unsweetened cocoa powder directly into the bowl. Beat the mixture steadily on medium-low speed for exactly 3 minutes. This extended mixing time helps develop the necessary structure to support the rich, heavy batter.
Step 4: Bake to Fudgy Perfection
Pour the thick chocolate batter into your prepared 9×13-inch pan, smoothing the surface into one flat, even sheet using an offset spatula. Slide the pan onto the center rack of the preheated oven and bake for 25 minutes. You will know they are ready when a toothpick inserted directly into the center comes out clean or with a few moist crumbs attached. Remove from the oven and let the brownies rest undisturbed for 10 minutes.
Step 5: Whip the Velvet Icing
While the brownies are having their initial cooling rest, prepare the frosting. In a separate clean mixing bowl, beat the ½ cup of softened butter, ½ cup of cocoa powder, 3 cups of powdered sugar, and ½ cup of milk together using an electric mixer. Start on low speed to avoid a flour cloud, then turn up to medium-high and whip until the icing is completely smooth, glossy, and spreadable.
Step 6: Frost, Cool, and Slice
Pour the fresh chocolate icing evenly across the top of the warm brownies, smoothing it smoothly to the edges of the pan. Let the frosted brownies cool completely to room temperature for 20 to 30 minutes so the icing sets up into a beautiful sheen. Lift the foil sling out of the pan, slice into neat squares using a sharp knife, and serve!
💡 Expert Tips for Success
- Frost While Comfortably Warm: Always pour and spread your chocolate icing over the brownies while they are still slightly warm (around the 10-minute mark post-baking). The residual heat from the brownie base will slightly melt the bottom of the frosting layer, helping it fuse tightly to the cake so the icing doesn’t slide off or crack when you slice it later!
- Use Room-Temperature Eggs: Ensure your 5 large eggs are completely at room temperature before mixing them into the melted butter. Cold eggs straight from the refrigerator will cause the warm melted butter to instantly seize up into tiny, hard fat clumps, ruining the velvety emulsion of your batter.
- The Clean-Slice Knife Trick: To achieve perfectly clean, sharp, professional-looking squares, let the iced brownies cool completely. Wipe a long, sharp chef’s knife down with a hot, damp paper towel before every single cut. The hot blade will glide through the rich icing and fudgy core like butter!
Variations and Substitutions
🥜 The Peanut Butter Marble: For a spectacular modern twist, drop dollops of warm, creamy peanut butter over the brownie batter right before it goes into the oven, using a butter knife to swirl it into beautiful decorative ribbons.
☕ The Mocha Depth Lifter: Whisk 1 teaspoon of instant espresso powder directly into the dry cocoa powder before mixing. Coffee operates as a natural flavor enhancer for cacao, drastically deepening the chocolate notes without leaving behind a strong coffee flavor.
🥛 The Dairy-Free Adjustment: To make this recipe dairy-free, seamlessly substitute the melted and softened butter for a high-quality plant-based block margarine, and utilize unsweetened almond or oat milk inside the frosting mix.
❓ Frequently Asked Questions (FAQs)
How should I handle and store leftover lunch lady brownies?
Once the icing has completely set, arrange the cut brownies in a single layer inside an airtight container. If you need to stack them, place a sheet of parchment paper between the layers to prevent the glossy frosting from sticking. They stay exceptionally moist, fudgy, and delicious at room temperature for up to 4 to 5 days!
Can I use all-purpose flour instead of cake flour?
Yes, you can! If you don’t have cake flour on hand, you can substitute an equal amount of standard all-purpose flour. However, because all-purpose flour has a higher protein content, the resulting brownies will turn out slightly denser and chewier rather than light and fluffy.
Can I freeze these frosted brownies?
Absolutely! These brownies freeze beautifully. Wrap individual frosted squares tightly in plastic wrap, slide them into a heavy-duty freezer bag, and store them for up to 2 to 3 months. When a chocolate craving strikes, simply let a square thaw on the kitchen counter for 15 to 20 minutes until the icing softens up perfectly!