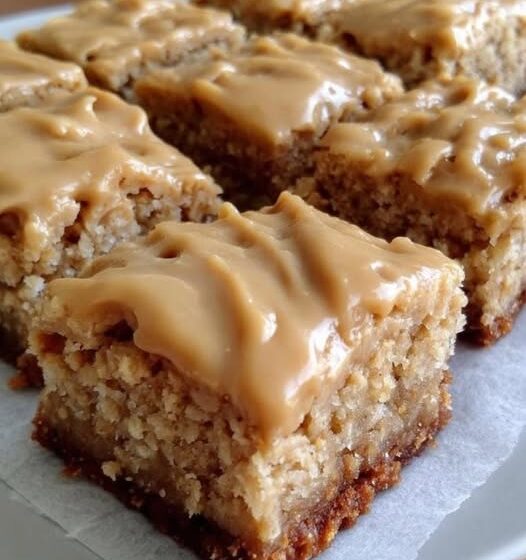
Think back to the cafeteria line: trays sliding along the rail, the clatter of plates, and a square of something sweet waiting at the end. Few treats capture that memory the way peanut butter bars do. These Peanut Butter Lunch Lady Bars bring that nostalgic feeling into your own kitchen, with a chewy, nutty base made from creamy peanut butter and rolled oats, sweetened with maple syrup and finished with a smooth layer of chocolate.
The best part is how little effort they take. There is no oven, no mixer and no baking time. You stir, press, pour and chill. With just 15 minutes of hands-on work, you end up with a pan of 12 rich, satisfying bars that suit lunchboxes, after-school snacks, potlucks and late-night cravings alike.
They can also be made dairy-free and easily adapted to be vegan or gluten-free, which makes them a friendly option for a mixed crowd. In this guide you will find the full recipe, step-by-step instructions with the reasoning behind them, tips for clean slices, variations, serving ideas, storage advice, nutrition details and answers to common questions.
Why You Will Love These Peanut Butter Lunch Lady Bars
They Are Pure Comfort Food
Creamy peanut butter, chewy oats and chocolate are a classic combination for a reason. Together they create a treat that feels familiar, homey and deeply satisfying, the kind of sweet that reminds you of simpler times.
No Baking Required
The entire recipe is made without turning on the oven. That keeps the kitchen cool, saves energy and makes the recipe very approachable for beginners and for kids who like to help.
Quick and Simple
Prep takes about 15 minutes, and cooking time is zero. Most of the wait is simply the chilling time while the chocolate sets, which means you can make the bars ahead and forget about them.
Made With Everyday Ingredients
Peanut butter, oats, maple syrup, vanilla, salt, chocolate chips and coconut oil are all easy to find and keep well in the pantry. If you cook regularly, you probably have most of them already.
Easy to Adapt to Dietary Needs
Made with dairy-free chocolate chips, the bars are dairy-free. Maple syrup keeps them free of refined sugar syrups and makes them vegan-friendly. Use certified gluten-free oats and they become gluten-free as well. (Please note that they contain peanuts, so they are not suitable for anyone with a peanut allergy.)
Great for Make-Ahead Snacking
Because the bars are stored in the refrigerator, you can prepare a batch at the start of the week and have grab-and-go treats ready for days.
Ingredients You Will Need
This recipe makes 12 bars.
For the Peanut Butter Oat Base
- 1 cup creamy peanut butter
- 2 cups rolled oats
- 1/2 cup maple syrup
- 1 teaspoon vanilla extract
- A pinch of salt
For the Chocolate Topping
- 1 cup dairy-free chocolate chips
- 2 tablespoons coconut oil
Equipment
- Large mixing bowl
- Baking pan, lined with parchment paper
- Small microwave-safe or heatproof bowl
- Spatula
- Sharp knife
A Closer Look at the Ingredients
Creamy Peanut Butter
Creamy peanut butter blends smoothly with the maple syrup and holds the oats together. Natural peanut butter works, but stir it very well first, because the oil can separate. If your peanut butter is very runny, the bars may be softer and need a bit more chilling time. A standard, no-stir peanut butter gives the firmest, neatest result.
Rolled Oats
Old-fashioned rolled oats give these bars their chewy, hearty texture. Quick oats can be used, but they will make the base a little softer and denser. Steel-cut oats are not a good substitute, because they stay hard without cooking.
Maple Syrup
Maple syrup sweetens the bars and acts as the glue that helps hold everything together. It also adds a gentle, caramel-like depth that goes beautifully with peanut butter. Use pure maple syrup for the best flavor.
Vanilla Extract
A teaspoon of vanilla rounds out the flavors and makes the peanut butter taste richer and sweeter.
Salt
Just a pinch is enough. It balances the sweetness and brings out the nutty flavor in the peanut butter.
Dairy-Free Chocolate Chips
The chocolate topping gives the bars their glossy, decadent finish. Dairy-free chips keep the recipe suitable for people who avoid dairy. If dairy is not an issue, regular semi-sweet or milk chocolate chips work equally well.
Coconut Oil
Coconut oil melts with the chocolate to make it smooth and pourable, and it helps the topping set into a soft, sliceable layer that does not crack when you cut it.
How to Make Peanut Butter Lunch Lady Bars
Step 1: Mix the Base
In a large mixing bowl, combine the creamy peanut butter, rolled oats, maple syrup, vanilla extract and a pinch of salt. Stir until everything is evenly mixed and the oats are fully coated. The mixture will be thick and sticky, a bit like a dense cookie dough.
Step 2: Press the Mixture Into a Lined Pan
Line a baking pan with parchment paper, leaving a little overhang on the sides so you can lift the finished bars out easily. Scoop the oat mixture into the pan and press it down firmly and evenly. Use the back of a spoon, a spatula or your fingertips. Pressing firmly is important, because a packed base holds together when sliced.
Step 3: Melt the Chocolate and Coconut Oil
In a separate bowl, combine the dairy-free chocolate chips and coconut oil. Melt them together, either in the microwave in short bursts, stirring between each one, or in a heatproof bowl set over simmering water. Stir until the mixture is completely smooth and glossy.
Step 4: Pour on the Chocolate
Pour the melted chocolate over the peanut butter oat base. Use a spatula to spread it into an even layer, all the way to the edges.
Step 5: Chill Until Set
Refrigerate the bars until the chocolate is firm. This usually takes about an hour or longer, depending on the thickness of the layers and the temperature of your refrigerator.
Step 6: Slice and Serve
Lift the slab out of the pan using the parchment paper overhang. Cut into 12 squares and enjoy.
Pro tip: For a neater slice, run a knife under hot water, wipe it dry, and then cut the bars. The warm blade glides through the chocolate without cracking it.
Recipe Card
Servings: 12 Prep time: 15 minutes Cooking time: 0 minutes (chilling required) Course: Dessert Cuisine: American Difficulty: Easy
Quick directions
- Mix the peanut butter, oats, maple syrup, vanilla and salt in a bowl.
- Press the mixture firmly into a lined baking pan.
- Melt the chocolate chips with the coconut oil until smooth.
- Pour the chocolate over the base and spread evenly.
- Refrigerate until the chocolate sets, then slice into squares.
Nutrition Information
Approximate values per bar (1 of 12 servings):
- Calories: 250 kcal
- Fat: 14 g
- Carbohydrates: 25 g
- Protein: 7 g
- Fiber: 4 g
- Sugar: 12 g
- Sodium: 90 mg
These numbers are estimates and will vary depending on the brands and ingredients you use.
Why This Recipe Works
The Syrup and Peanut Butter Hold It All Together
Without eggs, flour or butter, the base relies on the sticky combination of peanut butter and maple syrup to bind the oats. Together they create a dense, chewy mixture that keeps its shape once chilled.
Coconut Oil Keeps the Chocolate Sliceable
Plain melted chocolate can set into a hard, brittle shell that shatters when you slice it. Adding a little coconut oil softens the set, so the topping cuts cleanly and has a pleasant, smooth bite that matches the chewy base.
Chilling Does the Final Work
Cold temperatures firm up both the peanut butter in the base and the chocolate on top. Giving the bars enough time in the refrigerator means they will slice neatly and hold together when you pick them up.
Balanced Flavors
The sweetness of the maple syrup and chocolate is tempered by the salt and the earthy taste of the oats. The result is satisfying without being cloying.
Expert Tips for Success
Use High-Quality Ingredients
With so few ingredients, each one matters. Good peanut butter, real maple syrup and decent chocolate make a noticeable difference in flavor.
Press the Base Firmly
Loose oats lead to crumbly bars. Use something flat, such as the bottom of a measuring cup, to compress the mixture tightly into the pan.
Cool Completely Before Cutting
Let the bars chill fully so the chocolate and base are firm. Cutting too early can cause the layers to smear or separate.
Keep Them Cold
Because the base contains no flour and is not baked, the bars are happiest cold. Store them in the refrigerator in an airtight container to keep them firm and extend their shelf life.
Use a Lined Pan
Parchment paper makes it easy to lift the bars out and prevents sticking. If you do not have parchment, lightly grease the pan.
Let the Chocolate Cool Slightly
If the melted chocolate is very hot when you pour it, it may soften the top of the base. Let it cool for a minute or two before pouring.
Warm Your Knife
Run the blade under hot water and dry it between cuts for the cleanest edges.
Variations and Substitutions
Add Texture With Nuts or Dried Fruit
Stir chopped nuts or dried fruits such as raisins, cranberries or chopped dates into the oat mixture for extra crunch and chew.
Try a Peanut Butter Drizzle
Instead of covering the bars with chocolate, drizzle melted peanut butter across the top for a double-nutty twist.
Switch the Nut Butter
Almond butter can be used in place of peanut butter, giving the bars a slightly different, more delicate nutty flavor. Sunflower seed butter is a possible option for anyone avoiding nuts, though the flavor will change.
Swap the Sweetener
Honey can be used instead of maple syrup. Keep in mind that honey is not vegan.
Make Them Gluten-Free
Use certified gluten-free rolled oats to make a completely gluten-free version of the bars. Check the labels on the chocolate chips as well.
Make Them Vegan
Use maple syrup, dairy-free chocolate chips and coconut oil as listed, and double-check that your peanut butter does not contain any animal-derived ingredients.
Use Regular Chocolate
If you do not need dairy-free bars, swap in semi-sweet, milk or dark chocolate chips, depending on your taste.
Top With a Sprinkle
Scatter chopped peanuts, flaky salt, shredded coconut or mini chocolate chips over the chocolate before it sets for extra texture and visual appeal.
What to Serve With Peanut Butter Lunch Lady Bars
For a Quick Snack on the Go
These bars are easy to wrap individually and carry in a lunchbox, backpack or gym bag. They make a satisfying midday pick-me-up.
With a Drink
Pair them with a glass of cold almond milk or a piping hot cup of coffee for the ultimate indulgence. A mug of tea or a glass of oat milk also works well.
As a Special Dessert
For a special occasion, serve the bars with a scoop of dairy-free vanilla ice cream and a sprinkle of crushed peanuts for added crunch. The cold ice cream and chewy bar make a wonderful combination.
On a Dessert Platter
Cut the bars into smaller squares and arrange them on a tray with cookies, brownies and fruit for a potluck or party.
Storage and Make-Ahead Tips
Refrigerating
Store the bars in an airtight container in the refrigerator. Properly stored, they will keep for up to a week, although they tend to disappear much sooner than that. Place parchment paper between layers to prevent sticking.
Freezing
The bars can be frozen for longer storage. Wrap individual squares or layer them with parchment in a freezer-safe container, then thaw in the refrigerator before eating.
Making Ahead
These bars are ideal for making ahead. Prepare them a day or two before an event, keep them chilled and slice just before serving.
Frequently Asked Questions
Can I use crunchy peanut butter instead of creamy?
Yes. Creamy peanut butter gives the best texture for the bars, but crunchy peanut butter is fine if you like added crunch.
How long do these bars last?
When stored properly in the refrigerator, they last up to a week.
Are these bars vegan?
They can be. With maple syrup, dairy-free chocolate chips and coconut oil, the ingredient list contains no animal products. Always check labels to be sure.
Are they gluten-free?
Oats are naturally gluten-free, but they are often processed alongside wheat. Use oats labeled certified gluten-free to make them truly gluten-free.
Do I need to bake these bars?
No. Everything is mixed, pressed, topped and chilled, with no oven needed.
Why are my bars crumbly?
The base may not have been pressed firmly enough, or the peanut butter may have been too dry. Press the mixture firmly into the pan and make sure the oats are fully coated with the peanut butter and syrup.
Why is my chocolate topping cracking?
If chocolate sets too hard, it can crack when sliced. Coconut oil helps prevent this. Also try using a warm knife and allowing the bars to sit at room temperature for a few minutes before cutting.
Can I make them nut-free?
Peanut butter is the star of this recipe, but you could replace it with sunflower seed butter for a nut-free alternative. The flavor will be different.
Can I use quick oats?
You can, but the texture will be softer. Old-fashioned rolled oats give a chewier, more substantial bar.
What size pan should I use?
A small baking pan, such as an 8×8-inch or 9×9-inch square pan, works well. A smaller pan gives thicker bars, and a larger pan gives thinner ones.
Can I double the recipe?
Yes. Use a 9×13-inch pan and double all of the ingredients.
Final Thoughts
Some recipes earn their place not by being complicated but by being comforting. These Peanut Butter Lunch Lady Bars deliver rich peanut butter flavor, chewy oats and a decadent chocolate topping in a no-bake treat that anyone can make. They bring back memories of childhood and simpler times, and they are just as welcome at a modern snack table as they were on a cafeteria tray.
Make a pan, chill it, and cut it into squares. Share them with friends and family, tuck a few into a lunchbox, and keep a stash in the refrigerator for the moments when you need something sweet. It is a small, timeless recipe that always feels like a treat.

