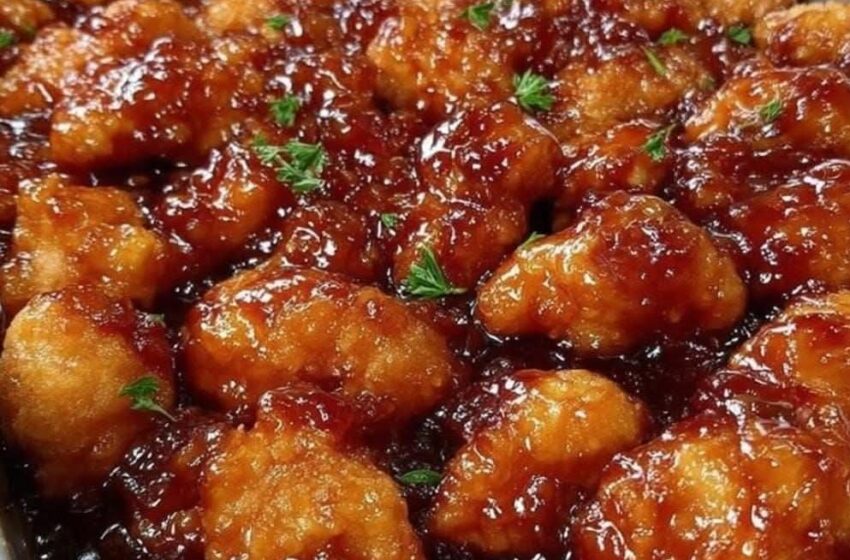
Sweet and sour chicken is one of those dishes that nearly everyone enjoys: tender chicken, bright peppers and pineapple, and a glossy sauce that balances sweet, tangy, and savory. This baked version brings it all together in a single baking dish. There is no deep frying and no standing over a wok. You stir together a quick sauce, coat the chicken in cornstarch, arrange the vegetables and pineapple around it, pour the sauce over everything, and let the oven do the work.
The result is juicy chicken thighs in a sticky sauce with softened peppers, onion, and sweet pineapple, ready to spoon over steamed rice. It is a practical weeknight meal, it is easy to adapt, and it keeps well for meal prep.
This guide covers why you will love it, the ingredients and why each one is there, the method with the reasoning behind each step, a recipe card with nutrition information, tips for better results, variations and substitutions, serving ideas, storage and freezing advice, troubleshooting, and answers to common questions.
Why You Will Love This Baked Sweet and Sour Chicken
- One baking dish. The chicken, vegetables, pineapple, and sauce all bake together, so cleanup is easy.
- No frying. Baking gives you tender chicken without a pot of hot oil.
- Balanced flavor. Soy sauce, rice vinegar, ketchup, and brown sugar create a sauce that is savory, tangy, and sweet.
- Colorful and varied. Red, green, and yellow bell peppers, onion, and pineapple make the dish bright and interesting.
- Easy to adapt. Swap the chicken, change the sweetener, add vegetables, or turn up the heat.
- Good for meal prep. The cooked dish keeps in the refrigerator for several days.
- Serves 4. The recipe is sized for a family dinner.
At a Glance
| Detail | Amount |
|---|---|
| Course | Main dish |
| Difficulty | Medium |
| Servings | 4 |
| Prep time | 20 minutes |
| Cooking time | 45 minutes |
| Oven temperature | 400°F (200°C) |
| Covered bake | 25 to 30 minutes |
| Uncovered bake | 10 to 15 minutes |
| Calories (per serving) | 320 kcal |
Ingredients for Baked Sweet and Sour Chicken
For the Chicken and Vegetables
- 4 boneless, skinless chicken thighs
- 1 red bell pepper
- 1 green bell pepper
- 1 yellow bell pepper
- 1 cup pineapple chunks (fresh or canned)
- 1 white or yellow onion
- 2 tablespoons cornstarch (or arrowroot powder for a paleo version)
For the Sweet and Sour Sauce
- 3 garlic cloves, minced
- 1/4 cup soy sauce (or tamari for a gluten-free option)
- 1/4 cup rice vinegar
- 1/3 cup ketchup (or tomato paste)
- 1/4 cup brown sugar (or sweetener of choice)
- 1/2 cup water
A Closer Look at the Ingredients
Boneless, Skinless Chicken Thighs
Thighs stay juicy during a longer bake, which makes them a forgiving choice. Boneless, skinless thighs also cook quickly and evenly, which is why they are recommended over bone-in pieces.
Bell Peppers
Using red, green, and yellow peppers gives the dish color and a mix of mild sweetness and slight bitterness. They soften in the sauce as the dish bakes.
Pineapple Chunks
Fresh or canned pineapple adds sweetness and a tropical tang that is the signature of sweet and sour dishes.
Onion
White or yellow onion softens in the oven and adds savory depth to the sauce.
Garlic
Minced garlic goes straight into the sauce for aromatic flavor.
Soy Sauce or Tamari
Soy sauce supplies salt and umami. Use tamari if you want a gluten-free option.
Rice Vinegar
Rice vinegar provides the “sour” in sweet and sour. It is milder than many other vinegars.
Ketchup or Tomato Paste
Ketchup gives the sauce body, color, and a touch of sweetness and tang. Tomato paste is offered as an alternative.
Brown Sugar
Brown sugar sweetens the sauce and helps it turn sticky as it bakes. You can use another sweetener of your choice.
Cornstarch
Cornstarch coats the chicken and helps the sauce thicken as it bakes. Arrowroot powder can replace it for a paleo version.
Water
The ingredient list includes 1/2 cup of water, which helps loosen the sauce.
How to Make Baked Sweet and Sour Chicken
Step 1: Preheat and Prepare the Dish
Preheat the oven to 400°F (200°C). Line a baking dish with parchment paper for easy cleanup.
Step 2: Make the Sauce
In a bowl, combine the soy sauce, rice vinegar, ketchup, brown sugar, and minced garlic.
[Editor note: the original recipe lists 1/2 cup of water but does not say where to add it. It most likely belongs in the sauce. Please confirm before publishing.]
Mixing the sauce first means the sugar has time to start dissolving while you prep the rest.
Step 3: Coat the Chicken
In a separate bowl, coat the chicken thighs with the cornstarch, then arrange them in the baking dish.
The cornstarch gives the chicken a light coating that helps the sauce cling and thicken.
Step 4: Add the Vegetables and Pineapple
Place the bell peppers, onion, and pineapple chunks around the chicken in the dish.
Step 5: Add the Sauce
Pour the sweet and sour sauce over the chicken and vegetables, making sure everything is evenly coated.
Step 6: Bake Covered
Cover the dish with foil and bake in the preheated oven for 25 to 30 minutes, or until the chicken is cooked through.
Covering the dish traps steam, which cooks the chicken and softens the vegetables without drying out the sauce.
Step 7: Bake Uncovered
Remove the foil and bake for 10 to 15 minutes more, to allow the sauce to thicken and the chicken to crisp up.
Step 8: Serve
Serve the baked sweet and sour chicken hot over steamed rice or quinoa, garnished with fresh herbs or sesame seeds.
Baked Sweet and Sour Chicken Recipe Card
Course: Main dish
Difficulty: Medium
Servings: 4
Prep time: 20 minutes
Cooking time: 45 minutes
Ingredients
- 4 boneless, skinless chicken thighs
- 1 red bell pepper
- 1 green bell pepper
- 1 yellow bell pepper
- 1 cup pineapple chunks (fresh or canned)
- 1 white or yellow onion
- 3 garlic cloves, minced
- 1/4 cup soy sauce (or tamari for a gluten-free option)
- 1/4 cup rice vinegar
- 1/3 cup ketchup (or tomato paste)
- 1/4 cup brown sugar (or sweetener of choice)
- 2 tablespoons cornstarch (or arrowroot powder for a paleo version)
- 1/2 cup water
Instructions
- Preheat the oven to 400°F (200°C) and line a baking dish with parchment paper.
- In a bowl, mix the soy sauce, rice vinegar, ketchup, brown sugar, and minced garlic to make the sauce. [Editor note: confirm where the 1/2 cup water goes.]
- Coat the chicken thighs with the cornstarch and place them in the baking dish.
- Add the bell peppers, onion, and pineapple chunks around the chicken.
- Pour the sauce over the chicken and vegetables, making sure everything is evenly coated.
- Cover the dish with foil and bake for 25 to 30 minutes, until the chicken is cooked.
- Remove the foil and bake for 10 to 15 minutes more, until the sauce thickens and the chicken crisps up.
- Serve hot over steamed rice, garnished with fresh herbs or sesame seeds.
Nutrition Information
The original recipe lists the following per serving. Units for everything except calories were not given in the source; the units below are the usual ones for these values.
| Nutrient | Amount |
|---|---|
| Calories | 320 kcal |
| Fat | 8.5 g |
| Carbohydrates | 32 g |
| Protein | 28 g |
| Sodium | 850 mg |
| Fiber | 3.5 g |
| Sugar | 20 g |
These figures are the source’s own estimates and do not include rice or other sides.
Why This Recipe Works
Thighs stay moist. Dark meat holds up to oven heat better than lean cuts.
Cornstarch helps the sauce thicken. A light coating on the chicken gives the sauce something to cling to as it bakes.
Covering, then uncovering. The foil stage cooks everything through gently. The uncovered stage lets the sauce reduce and the chicken take on color.
A balanced sauce. Soy sauce for salt and umami, vinegar for tang, ketchup and brown sugar for sweetness, and garlic for aroma.
Vegetables and pineapple add contrast. Soft peppers and onion and sweet pineapple make each forkful different.
Expert Tips for Success
- Marinate if you have time. Marinating the chicken in the sweet and sour sauce for at least 30 minutes before baking can enhance the flavor and tenderize the meat.
- Broil at the end for a crispier finish. A few minutes under the broiler at the end of cooking gives a golden brown surface. Watch closely, because the sugar in the sauce can burn.
- Adjust the sauce to taste. Add more brown sugar for sweetness or more rice vinegar for tang.
- Try other vegetables. Broccoli, snap peas, or carrots add color and nutrients.
- Cut the pieces evenly. If you cut the peppers and onion into similar sizes, they cook at the same rate.
- Check the chicken. Make sure it is cooked through before serving. As a general food-safety guideline, chicken is safe at an internal temperature of 165°F (74°C). This is my addition, not part of the original recipe.
- Use parchment. Lining the baking dish makes cleanup quick.
Variations and Substitutions
Chicken Breasts or Tenderloins
Swap the thighs for boneless chicken breasts or tenderloins for a leaner option. Leaner cuts can dry out more easily, so check them closely.
Spicy Version
Add red pepper flakes or sriracha to the sauce, or drizzle sriracha over the finished dish.
Vegetarian or Vegan Version
Replace the chicken with tofu or tempeh. The source also mentions seitan, but seitan is made from wheat gluten, so it is not suitable if you are cooking gluten-free. Use a vegan-friendly sweetener such as agave nectar or maple syrup.
Low-Carb Base
Serve over cauliflower rice or zucchini noodles instead of rice.
Gluten-Free Version
Use tamari instead of soy sauce. Check that your other ingredients, such as the ketchup, are gluten-free.
Paleo Version
Use arrowroot powder in place of cornstarch, as the source suggests. Keep in mind that the original recipe also contains brown sugar, soy sauce, and ketchup, so any “paleo” adaptation depends on the substitutions you choose.
What to Serve with Baked Sweet and Sour Chicken
- Rice. Fluffy white rice or fragrant jasmine rice is the classic base.
- Quinoa. A hearty alternative to rice.
- Steamed broccoli or bok choy. A fresh green side.
- Cucumber salad. Dress it with a light vinaigrette for a cooling contrast.
- Pickled vegetables. Tangy pickles provide a bright contrast.
- Garnishes. Sesame seeds, chopped green onions, or fresh cilantro add freshness and visual appeal.
Make-Ahead, Storage, and Freezing
Meal Prep and Refrigerating
This dish is a good fit for meal prep. Store the cooked dish in an airtight container in the refrigerator for up to 3 to 4 days, and reheat before serving.
Freezing
You can freeze the baked sweet and sour chicken in a freezer-safe container for up to 2 to 3 months. Thaw it overnight in the refrigerator before reheating.
Reheating
Reheat until the chicken is hot throughout. If the sauce has thickened in the refrigerator, a small splash of water can loosen it. This is my suggestion, not part of the original recipe.
Understanding the Method
Why Bake at 400°F?
A hot oven helps the sauce reduce and the surface of the chicken take on color, while the foil stage keeps the chicken from drying out in the first half of the cook.
Why Cover the Dish First?
Foil traps steam. That moisture cooks the chicken evenly and softens the peppers and onion, so the dish does not start to scorch before the chicken is done.
Why Uncover at the End?
Taking off the foil lets the extra liquid evaporate. The sauce thickens and turns sticky, and the surface of the chicken firms up.
Why Coat the Chicken in Cornstarch?
A light coat of cornstarch gives the sauce something to cling to and helps it thicken as it bakes. It is a simpler, lower-fuss step than dredging and frying.
Why Pour the Sauce Over Everything?
Coating the chicken and the vegetables evenly means every piece takes on the same sweet and sour flavor.
Preparing the Vegetables and Pineapple
- Peppers: Cut the three peppers into bite-sized pieces of similar size.
- Onion: Cut the onion into chunks or wedges so it holds its shape in the oven.
- Pineapple: Use one cup of chunks. The recipe allows fresh or canned. If you use canned pineapple, it is a good idea to drain it so the extra juice does not thin the sauce. This is my suggestion rather than part of the original recipe.
- Garlic: Mince it finely so it spreads evenly through the sauce.
Arranging the vegetables around the chicken, rather than piling them on top, helps them cook evenly and lets the sauce reach every piece.
A Note on Dietary Labels
The original recipe describes this dish as gluten-free, low-carb, paleo-friendly, and diabetic-friendly. Those labels depend on the substitutions you make, and some of them do not match the base recipe. As written, the dish includes brown sugar and ketchup and lists 32 grams of carbohydrate and 20 grams of sugar per serving. If you are following a specific dietary plan for medical reasons, check the ingredients and nutrition information against your own guidelines before serving.
Troubleshooting Guide
The sauce is too thin
Bake uncovered for a little longer so the sauce can reduce and thicken. The cornstarch on the chicken also helps thicken the sauce as it bakes.
The sauce is too sweet
Add a little more rice vinegar for balance, or reduce the brown sugar next time.
The sauce is too tangy
Add a little more brown sugar to round it out.
The chicken is not crisp
The dish is baked with a sauce, so it will be tender and sticky rather than crunchy. For a crispier surface, broil for a few minutes at the end.
The vegetables are too soft
Cut them into slightly larger pieces next time.
The chicken is dry
Thighs are forgiving, but leaner cuts such as breast can dry out. Check them as soon as the covered baking time is up.
The sugar is burning
Watch the dish closely under the broiler and in the last minutes of baking, because the sugar in the sauce can scorch.
Frequently Asked Questions
Can I use bone-in chicken?
Yes, but boneless, skinless thighs are recommended for quicker and more even cooking.
How can I make it spicier?
Increase the red pepper flakes in the sauce, or drizzle sriracha over the finished dish.
Can I meal prep this dish?
Yes. Store it in an airtight container in the refrigerator for 3 to 4 days.
Can I freeze it?
Yes, for up to 2 to 3 months in a freezer-safe container. Thaw it overnight in the refrigerator.
Is it gluten-free?
It can be, if you use tamari in place of soy sauce and check your other ingredients.
Can I use tomato paste instead of ketchup?
Yes, the recipe lists tomato paste as an alternative.
Can I use canned pineapple?
Yes, the recipe allows fresh or canned pineapple.
Can I make it with chicken breast?
Yes. Boneless breasts or tenderloins give a leaner result.
Can I make it vegetarian?
Use tofu or tempeh in place of the chicken.
What should I serve it with?
Steamed rice or quinoa, with steamed broccoli, bok choy, or a cucumber salad.
How many calories are in a serving?
The source lists 320 calories per serving, without rice.
Final Thoughts
Baked sweet and sour chicken delivers the flavors you love from takeout in a single baking dish. Tender chicken thighs, colorful peppers, sweet pineapple, and a tangy-sweet sauce bake together while you get the rice ready. It is easy to adapt, simple to clean up, and holds up well for leftovers and meal prep.
Coat the chicken, pour the sauce over everything, bake covered, then uncover to let the sauce thicken. Taste the sauce and adjust the sweetness and tang to suit your family, and you will have a dependable dinner for busy weeknights.