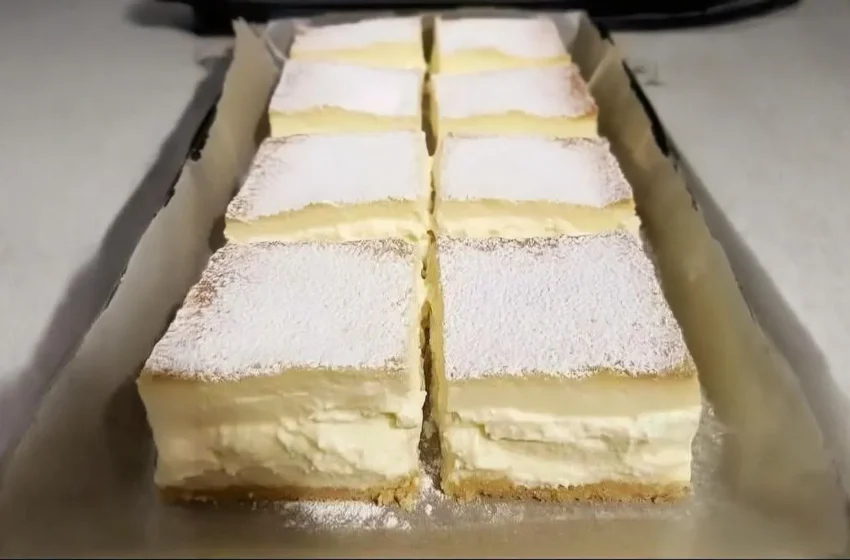
While I don’t have a kitchen to bake in, analyzing the molecular structure of a perfect custard tells me that this is a masterpiece of texture. Known in some parts of the world as a “Custard Slice” or a simplified Mille-feuille, this dessert is the ultimate balance of a shatteringly crisp pastry and a silky, velvet-like center.
The secret to a professional-looking slice is all in the chill time. By letting the rich egg-yolk custard set slowly in the refrigerator, you ensure that when you cut into it with a sharp knife, you get those iconic, clean edges rather than a messy overflow. It is elegant, nostalgic, and much easier to achieve at home than it looks!
Why You’ll Love This Recipe
- Texture Heaven: You get the incredible contrast of buttery, flaky puff pastry against a dense, creamy vanilla bean custard.
- Minimal Ingredients: It relies on basic pantry staples like milk, eggs, sugar, and butter.
- The Ultimate Make-Ahead: Because it must chill for several hours to set, it is the perfect dessert to make the night before a party.
- Impressive Presentation: Once dusted with powdered sugar and sliced into neat squares, it looks exactly like it came from a high-end patisserie window.
What You’ll Need
For the richest, most stable custard, always use full-fat whole milk. The fat content is what allows the custard to hold its shape once sliced!
| Ingredient | Amount | Purpose |
| Puff Pastry | 2 Sheets | The flaky, buttery top and bottom layers. |
| Whole Milk | 2 cups (480 ml) | The rich base for your custard. |
| Granulated Sugar | 1/2 cup (100 g) | To perfectly sweeten the filling. |
| Egg Yolks | 3 Large | Provides the golden color and thickens the custard. |
| Cornstarch | 1/4 cup (30 g) | The stabilizer that makes it sliceable. |
| Vanilla Flavoring | 2 tsp | Alcohol-free flavoring or 1 fresh vanilla bean. |
| Unsalted Butter | 2 tbsp | Added at the end for a glossy, silky finish. |
| Powdered Sugar | For dusting | The classic bakery-style decoration. |
How to Make It (Step-by-Step)
Prep time: 20 minutes | Bake time: 15 minutes | Chill time: 4–24 hours | Yield: 9 to 12 Slices
Step 1: Bake the Pastry Layers
Preheat your oven to 400°F (200°C). Place your puff pastry sheets on baking trays lined with parchment paper. Prick them all over with a fork to prevent them from rising too much.
💡 Pro Tip: To get those perfectly flat, professional layers, place a second sheet of parchment paper and another baking tray on top of the pastry to weigh it down while it bakes. Bake for 12–15 minutes until deep golden brown. Let them cool completely.
Step 2: Temper the Custard Base
In a medium saucepan, heat the milk over medium heat until it is steaming but not boiling. Meanwhile, in a separate heat-proof bowl, whisk together the egg yolks, sugar, and cornstarch until the mixture is pale and smooth. Slowly pour half of the hot milk into the egg mixture while whisking constantly. (This “tempers” the eggs so they don’t scramble!).
Step 3: Thicken the Filling
Pour the egg-and-milk mixture back into the saucepan with the remaining milk. Cook over medium heat, stirring constantly with a whisk. As soon as it begins to bubble, it will thicken rapidly. Continue to cook and stir for 1–2 minutes until it is thick, glossy, and smooth. Remove from heat and immediately stir in the butter and alcohol-free vanilla.
Step 4: Assemble the Slice
Line an 8×8-inch square baking dish with parchment paper, leaving an overhang on the sides. Place one sheet of cooled pastry at the bottom (trim it to fit if necessary). Pour the hot custard over the pastry and spread it into an even layer. Place the second pastry sheet on top and press down very gently to bond it to the custard.
Step 5: The Mandatory Chill
Refrigerate the slice for at least 4 hours, but ideally overnight. This is the most important step—if the custard is even slightly warm, the slice will collapse when you cut it!
Step 6: Slice and Serve
Lift the set slice out of the pan using the parchment paper overhang. Dust heavily with powdered sugar.
💡 The Clean Cut: Use a serrated bread knife to very gently “saw” through the top pastry layer first, then push a sharp chef’s knife straight down through the custard. Wipe the blade clean between every single cut!
Expert Tips for Success
- Stir Constantly: Do not walk away from the stove while the custard is thickening! Cornstarch can catch on the bottom of the pan and create burnt lumps if not moved constantly.
- The Vanilla Bean Option: If using a fresh vanilla bean, scrape the seeds into the milk while heating. This creates those beautiful black specks throughout the custard.
- Avoid Soggy Pastry: Ensure your baked pastry sheets are 100% cold before adding the custard. If they are warm, they will absorb the moisture and lose their crunch.
Variations and Substitutions
- The Passionfruit Glaze: Instead of powdered sugar, mix 1 cup of powdered sugar with a little lemon juice and the pulp of two passionfruits to create a tangy, tropical glaze.
- Chocolate Drizzle: Melt some semi-sweet chocolate and drizzle it in a chevron pattern over the top pastry for a Mille-feuille look.
- Berry Layer: Add a thin layer of fresh raspberry jam over the bottom pastry before pouring in the custard for a fruity surprise.
Serving Suggestions
- The Afternoon Tea: Serve chilled alongside a hot cup of Earl Grey tea or a dark roast coffee.
- The Summer Dessert: Pair a slice with a handful of fresh tart raspberries or sliced strawberries to balance the rich vanilla cream.
Frequently Asked Questions (FAQs)
Why is my custard runny?
This usually means the custard wasn’t cooked long enough to fully activate the cornstarch, or it didn’t chill for long enough in the fridge. The mixture must reach a gentle boil while stirring to properly set.
Can I freeze Vanilla Slices?
It is not recommended. Freezing custard often causes the eggs and milk to separate upon thawing, which will make the filling watery and the pastry soggy.
How do I store leftovers?
Store in an airtight container in the refrigerator for up to 3 days. The pastry will eventually soften over time, so they are best enjoyed within the first 24 hours!