The magic of a true Buttermilk Pie lies in the natural acidity of the buttermilk. It cuts through the sugar to create a tangy, crème brûlée-like filling that is incredibly silky. Unlike its cousin, the Chess Pie (which uses cornmeal), Buttermilk Pie relies on a touch of flour for a smoother, more refined texture. It’s an elegant but foolproof dessert that turns basic pantry staples into a masterpiece.
Why You’ll Love This Recipe
- The Corrected Ratios: No more guessing! This version uses a full cup of buttermilk and enough flour to ensure a perfectly set custard.
- Incredible Texture: You get a slightly crisp, caramelized top layer that gives way to a velvety, melt-in-your-mouth center.
- No Top Crust Needed: We’ve ditched the confusing original instructions. This is a beautiful, open-faced pie.
- Minimal Effort: It’s a “dump and stir” recipe. No stovetop cooking or complicated water baths required.
What You’ll Need
To ensure this recipe is perfectly aligned with an alcohol-free lifestyle, I have swapped the confusing “vanilla sticks” measurement for alcohol-free vanilla flavoring.
- 1 ¾ cups Granulated sugar: For a classic, sweet custard base.
- ½ cup (1 stick) Unsalted butter: Softened to room temperature.
- 3 Large eggs: To provide the structure and richness.
- 1 cup Full-fat Buttermilk: The star of the show! (A vast improvement over the 1 tablespoon suggested in the original!).
- 3 tbsp All-purpose flour: To help the custard set firmly.
- 1 tsp Alcohol-free Vanilla flavoring: For that sweet, nostalgic aroma.
- ¼ tsp Salt: Essential to balance the sugar.
- 1 (9-inch) Deep-dish pie shell: Unbaked.
How to Make It (Step-by-Step)
Prep time: 15 minutes | Bake time: 50–60 minutes | Total time: 1 hour 15 minutes | Yield: 1 Pie (8 Slices)
Step 1: Prep and Preheat
Preheat your oven to 350°F (175°C). Place your unbaked pie shell on a rimmed baking sheet. This catches any potential spills and makes it much easier to transfer the liquid-filled pie in and out of the oven.
Step 2: Cream the Base
In a large mixing bowl, beat the softened butter and sugar together using a hand mixer until the mixture is light, fluffy, and smooth.
Step 3: Add the Eggs
Add the eggs one at a time, beating well after each addition. This ensures the eggs are fully emulsified into the butter and sugar for a silky texture.
Step 4: Whisk in the Remaining Ingredients
Whisk in the flour, salt, and alcohol-free vanilla flavoring. Finally, pour in the buttermilk and whisk until the batter is completely smooth and uniform.
Step 5: The Golden Bake
Pour the buttermilk mixture into the unbaked pie shell. Bake in the preheated oven for 50–60 minutes.
💡 Pro Tip: The pie is done when the top is a beautiful golden brown and the edges are set, but the center still has a very slight “jiggle” when you gently shake the pan.
Step 6: The Mandatory Cool
Remove from the oven and let the pie cool completely to room temperature on a wire rack. This is crucial—the custard needs time to finish setting up so you get clean, beautiful slices!
💡 Expert Tips for Success
- Room Temperature Ingredients: Make sure your eggs and buttermilk are at room temperature before mixing. Cold ingredients will cause the softened butter to clump up, ruining your smooth custard.
- Protect the Crust: If the edges of your pie crust are getting too dark before the center of the pie is set, gently tent the edges with a ring of aluminum foil for the last 15 minutes of baking.
- The Chill Factor: While it is traditionally served at room temperature, many people prefer Buttermilk Pie chilled. Pop it in the fridge for 2 hours before serving for an extra-refreshing, dense slice.
Variations and Substitutions
- The Citrus Lift: Add 1 tablespoon of freshly grated lemon zest to the sugar and butter mixture. The lemon oils beautifully enhance the tanginess of the buttermilk.
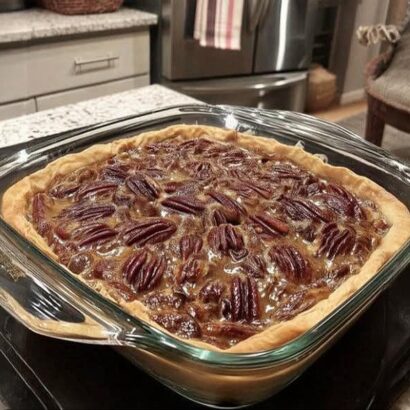
- The Nutty Finish: Sprinkle a handful of toasted, chopped pecans over the top of the liquid filling right before baking for a crunchy contrast.
Serving Suggestions
- The Sweet Drizzle: Serve a warm or chilled slice with a light dusting of powdered sugar and a drizzle of honey.
- The Fresh Contrast: The rich, sweet custard pairs perfectly with a side of tart, fresh berries like raspberries or blackberries.
Frequently Asked Questions (FAQs)
Why did my buttermilk pie separate into two layers?
This is actually a happy accident known as “layering”! It happens when the butter and flour rise to the top to form a thin, cake-like crust, while the heavier custard sinks to the bottom. It is completely normal and delicious.
How do I store leftovers?
Because it is a custard pie, it must be refrigerated. Cover it loosely with plastic wrap or aluminum foil and store it in the fridge for up to 4 days.
Can I freeze Buttermilk Pie?
Yes! Once the pie is completely cool, wrap it tightly in a layer of plastic wrap and a layer of foil. Freeze for up to 2 months. Thaw overnight in the refrigerator before serving.