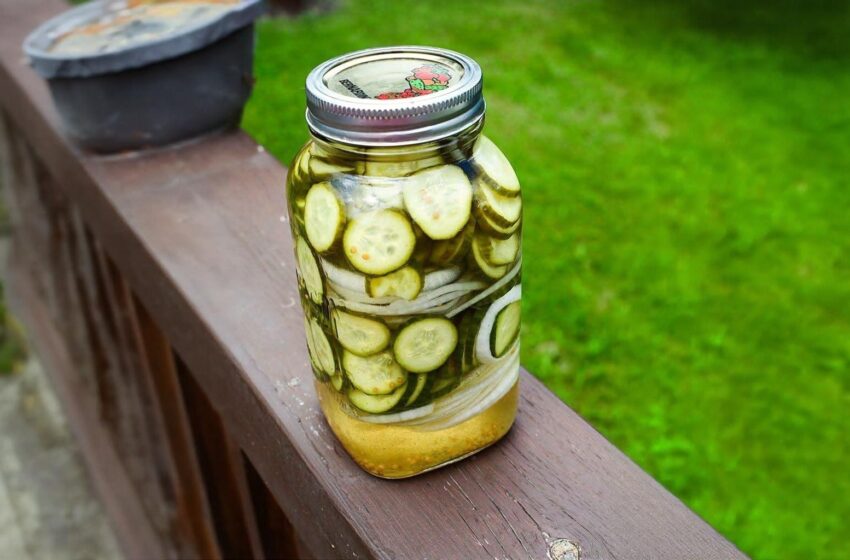
These sweet and tangy “bucket pickles” (often called pail pickles or refrigerator pickles) are the absolute easiest way to make homemade pickles! Similar in taste to classic bread and butter pickles but infinitely better, this nostalgic family recipe requires absolutely zero canning equipment. With just a quick homemade brine and a little patience while they chill in the fridge, you get a crunchy, sweet, and savory snack that will make you forget all about the store-bought jars!
Why You’ll Love This Recipe
🥒 No Canning Required: Skip the hot water baths, pressure cookers, and complicated sealing processes.
⏱️ Super Simple Prep: Just slice your vegetables, quickly boil the brine on the stove, pour, and walk away.
✨ Perfectly Balanced: A flawless balance of sweet sugar, tangy vinegar, and savory mustard and celery seeds.
🧅 Incredible Crunch: Because these are stored in the refrigerator rather than processed in a canner, the cucumbers retain an amazing, fresh crunch.
🏡 Budget-Friendly: A fantastic, economical way to use up a large summer garden harvest of cucumbers and onions!
Recipe Overview
- Prep time: 30 minutes
- Cook time: 5 minutes (to boil the brine)
- Chilling time: 1 to 3 weeks
- Total active time: 35 minutes
- Yield: 2 Quarts of pickles
What You’ll Need
The Vegetables:
- 12–15 Baby cucumbers: (Egyptian cucumbers or small pickling cucumbers work wonderfully). Look for firm, blemish-free veggies!
- 1–2 Sweet onions: Sliced. (Sweet onions taste much better with this specific brine than standard yellow or white onions).
The Sweet & Tangy Brine:
- 2 cups Water
- 2 cups White vinegar: The acidic backbone of the pickling liquid.
- 1 ¼ cups Granulated sugar: To create that signature sweet “bread and butter” flavor profile.
The Spices:
- 1 tsp Pickling salt: Crucial for pickling, as it doesn’t contain anti-caking agents that make the brine cloudy.
- 1 tsp Mustard seed: Adds a classic, tangy pickle flavor.
- 1 tsp Celery seed: For a wonderful, earthy aromatic note.
How to Make It (Step-by-Step)
Step 1: Slice the Vegetables
Wash your cucumbers thoroughly. Trim off the ends of the cucumbers and discard them, then slice the cucumbers into medallions about ⅛” to ¼” thick. Slice your sweet onions.
Step 2: Pack Your Containers
Place the sliced cucumbers and onions into a large, clean container. You can use a BPA-free, food-safe plastic bucket (like a clean ice cream pail) or large glass mason jars.
Step 3: Start the Brine
In a medium saucepan, heat the 2 cups of water to a boiling point.
Step 4: Dissolve the Sugar
Carefully add the white vinegar and the granulated sugar to the boiling water. Stir continuously until the sugar is completely dissolved into the liquid.
Step 5: Add the Spices
Remove the pot from the heat and stir in the pickling salt, mustard seed, and celery seed.
💡 Crucial Step: Taste your brine right now! If you love the flavor of the liquid, you will love the pickles. Adjust the sweetness or saltiness to your personal preference before pouring.
Step 6: Pour and Submerge
Carefully pour the hot brine directly over the cucumbers and onions in your bucket or jars, ensuring the vegetables are completely covered by the liquid. (The hot brine will lightly soften the raw bite of the onions).
Step 7: Chill and Wait
Cover the container tightly and place it in the refrigerator. Let the pickles sit undisturbed for 1 to 3 weeks before eating. The longer they sit in the brine, the stronger and more developed the flavor will be!
💡 Expert Tips for Success
🛑 Trim the Blossom End: Always cut off the blossom end of the cucumber before slicing! The blossom end contains an enzyme that can make your pickles turn out soft and mushy instead of crunchy.
🔪 Use a Mandoline: For perfectly uniform slices that pickle at the exact same rate, use a mandoline slicer for both your cucumbers and your onions. (Just watch your fingertips!).
🥣 Keep Them Submerged: As the days go by, the cucumbers will shrink slightly in the brine. You can always add a few more fresh cucumber slices to the bucket as space opens up!
Variations and Substitutions
🌶️ Spicy Kick: Sprinkle in your favorite spicy seasonings, a sliced jalapeño, or a heavy pinch of crushed red pepper flakes to add some sweet heat to the pickles.
🥕 Pickle Other Veggies: This sweet and tangy brine isn’t just for cucumbers! It works beautifully for pickling cauliflower florets, fresh green beans, carrots, or even beets.
🍎 Vinegar Swap: While standard white vinegar is classic, you can absolutely substitute it with apple cider vinegar for a fruitier, slightly more complex flavor profile.
📉 Less Sweet: If you prefer a hot and tangy pickle rather than a sweet one, you can significantly reduce or omit the sugar (though this changes the recipe from a “bread and butter” style to a sharp, sour dill style).
❓ Frequently Asked Questions (FAQs)
How long will these Bucket Pickles last in the fridge?
Under proper refrigeration, these pickles will easily last for 3 to 4 months. Because they are completely submerged in a vinegar-heavy brine, they hold their freshness exceptionally well.
Can I process and can these for my pantry?
If you want these to be shelf-stable in your pantry, you must formally can them. However, it is highly recommended to use the “hot pack” water bath method rather than a pressure cooker, as pressure cooking will make the cucumbers incredibly soft and mushy.
Do I have to use a bucket?
Not at all! While the nostalgic name comes from using a large, food-safe plastic pail (like an old ice cream bucket), this recipe works perfectly divided into several large glass mason jars. Just ensure whatever container you use has a tight-fitting lid!
Conclusion
Bucket Pickles are the ultimate testament to the fact that you don’t need a complicated canning setup to enjoy incredible, homemade preserves. By simply boiling a sweet and tangy spiced brine and pouring it over fresh cucumbers, you get a crisp, flavorful side dish that elevates sandwiches, burgers, and snack plates all season long. Slice up your veggies, mix that brine, and get ready for a jar of pure, quiet comfort!