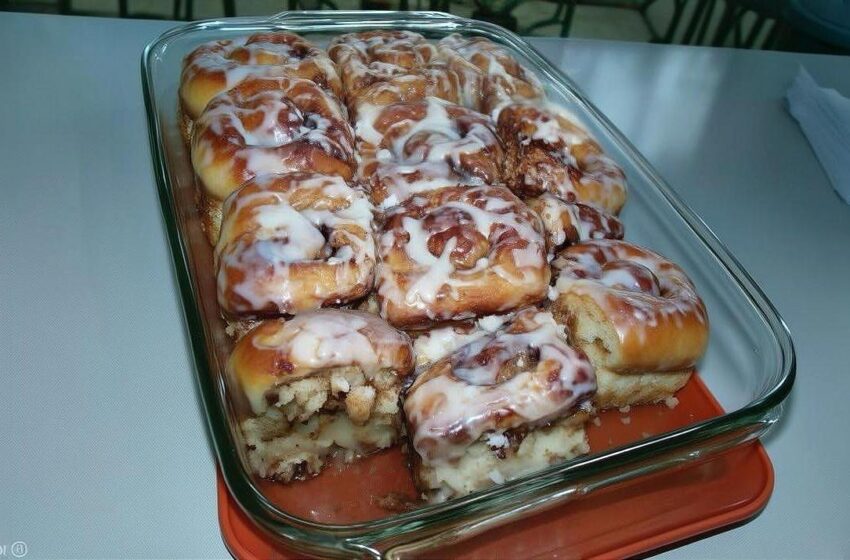
Homemade cinnamon rolls have a reputation for being an all-day project reserved for serious bakers, but this big-batch version quietly sidesteps most of that difficulty. Built on a foundation of boxed cake mix combined with yeast, this recipe produces a large tray of soft, golden, cinnamon-swirled rolls using a technique that’s considerably more forgiving than a traditional from-scratch yeasted dough — genuinely approachable for a beginner, while still delivering the soft, pillowy texture people expect from a proper cinnamon roll.
Why Cake Mix Gets Combined With Yeast
Using a boxed cake mix as part of a yeasted dough might seem unusual, but it solves a real problem for home bakers who don’t work with yeast regularly. Cake mix already contains sugar, some fat, and flavoring blended in precise proportions, which means a good portion of the dough’s flavor and tenderness comes pre-built into that single ingredient. Combined with yeast and the remaining flour, the cake mix contributes to a noticeably soft, slightly sweet dough without requiring the baker to measure out sugar, fat, and flavoring separately, the way a fully from-scratch cinnamon roll dough would demand.
This is part of why the recipe describes the dough as forgiving — the cake mix does a lot of the heavy lifting in terms of flavor and tenderness, reducing the margin for error that comes with balancing those elements manually.
Why the Water Temperature for the Yeast Matters So Much
This recipe specifically calls for warm water between 120–130°F when activating the yeast, and that range isn’t arbitrary. Yeast is a living organism, and its activity is highly temperature-dependent: water that’s too cool won’t properly activate the yeast, leaving the dough sluggish to rise, while water that’s too hot can kill the yeast outright, preventing any rise at all. Staying within that specific warm range gives the yeast the ideal environment to activate quickly and reliably, which is especially important in a recipe designed to be approachable for less experienced bakers who might not have as much intuition for judging “warm” by touch alone.
Why the Dough Gets Two Separate Rises
This recipe includes two distinct rising periods — one after the dough is first mixed and kneaded, and a second after the rolls are shaped and placed in the baking pan. Each rise serves a different purpose. The first rise, roughly an hour, allows the yeast to properly develop the dough’s structure and flavor before it’s shaped, giving the gluten network time to relax and the dough time to roughly double in size. The second, shorter rise after shaping allows the individual rolls to puff up again after being compressed and cut, ensuring they bake up soft and properly risen rather than dense, since the shaping and slicing process deflates some of that first rise.
Why the Filling Uses Softened, Not Melted, Butter
Spreading softened margarine or butter over the rolled-out dough, rather than melted butter, keeps the fat in a spreadable, controllable state that stays put on the dough’s surface rather than pooling or running off. That matters when the cinnamon-sugar mixture is sprinkled on next — softened butter provides a tacky surface for the sugar and cinnamon to adhere to evenly, ensuring a consistent swirl throughout each roll once everything is rolled up and sliced.
The Recipe
Course: Baking, Breakfast, Dessert, Snack
Cuisine: American
For the dough:
- 1 regular-size box of cake mix without pudding in the mix (store brand is fine)
- 2 packages rapid rise yeast
- 6¼ to 6½ cups all-purpose flour, divided
- 1 teaspoon salt
- 2½ cups warm water (120–130°F)
- 3 large eggs, beaten
- ⅓ cup vegetable oil
For the filling:
- 4 sticks margarine or butter, softened
- 2 cups granulated sugar mixed with ½ cup ground cinnamon
For the glaze:
- 2 cups sifted powdered sugar
- ¼ cup milk
- 1 teaspoon vanilla extract
Method
- Combine the dry ingredients. In a large mixing bowl, combine the cake mix, 2 cups of flour, yeast, and salt.
- Add the wet ingredients. Add the warm water, beaten eggs, and vegetable oil. Mix well until smooth.
- Add the remaining flour. Gradually stir in the remaining flour (about 4¼ to 4½ cups) until a soft, slightly sticky dough forms.
- Knead. Knead the dough on a lightly floured surface for about 5 to 7 minutes, until smooth and elastic.
- First rise. Place the dough in a greased bowl, cover with a towel or plastic wrap, and let rise in a warm place until doubled in size, about 1 hour.
- Shape the rolls. Punch down the dough and divide it into two equal portions. Roll each half into a large rectangle, about ¼ inch thick. Spread softened margarine evenly over the dough, then sprinkle with the cinnamon-sugar mixture, covering the entire buttered surface. Roll the dough up tightly, starting from the long side, and slice into 1½-inch thick rolls.
- Second rise. Place the rolls in greased baking pans, leaving a little space between each. Cover and let rise again for 30 to 45 minutes, until puffy.
- Bake. Bake at 350°F (175°C) for 20 to 25 minutes, or until golden brown.
- Make the glaze. Whisk together the powdered sugar, milk, and vanilla until smooth. Drizzle over the warm rolls before serving.
Tips for the Best Results
- Check your water temperature carefully. A kitchen thermometer takes the guesswork out of hitting the 120–130°F range needed to properly activate the yeast.
- Don’t rush either rise. Both rising periods are essential to the final texture — skipping or shortening them results in denser, less fluffy rolls.
- Knead just until smooth and elastic. Over-kneading can make the dough tougher than intended for this style of soft roll.
- Leave a bit of space between rolls in the pan. This gives them room to expand properly during the second rise and baking.
- Drizzle the glaze while the rolls are still warm. This helps it melt slightly into the rolls rather than sitting as a thick, separate layer.
Serving Suggestions
These rolls are best served warm, with either the classic vanilla glaze or a cream cheese frosting for extra richness. Paired with scrambled eggs and fresh fruit, they make a satisfying centerpiece for a full brunch spread, and they’re just as at home with a simple cup of hot coffee, tea, or cold milk. For holiday mornings or a cozy weekend treat, they work beautifully as the star of the table.
Storage and Freezing
Leftover rolls keep in an airtight container at room temperature for up to 2 days, or refrigerated for up to 5 days, reheating in the microwave for about 20 seconds to bring back their softness. For longer storage, unbaked shaped rolls can be frozen, or baked and cooled rolls can be frozen without frosting — wrap tightly and store for up to 2 months, thawing overnight and reheating before frosting and serving.
Variations Worth Trying
- Add nuts: chopped pecans or walnuts add a nice crunch to the filling.
- Add fruit: raisins or chopped apples swirled into the filling bring a fruity twist.
- Change the filling: swap the classic cinnamon-sugar for brown sugar and maple for a different flavor direction.
- Try a different glaze: maple glaze, caramel drizzle, or orange cream cheese frosting all offer easy variety.
Why This Big-Batch Recipe Is Worth Keeping on Hand
What makes this cinnamon roll recipe genuinely valuable isn’t just the size of the batch — it’s how forgiving the whole process is for a baker who might otherwise be intimidated by yeasted dough. The cake mix shortcut, combined with clear guidance on rise times and water temperature, removes much of the guesswork that trips up first-time bread bakers, while still delivering a tray of soft, golden, properly swirled rolls. For holidays, potlucks, or simply a weekend worth waking up for, it’s easy to see why this recipe has earned its place as a trusted go-to.