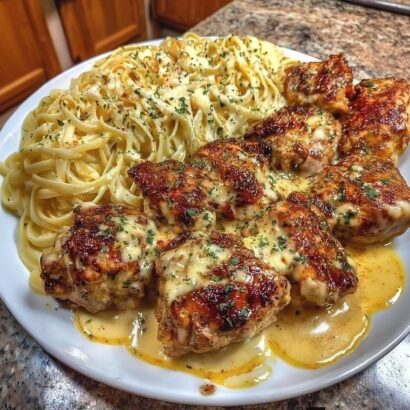
Some dinners earn their spot in a weekly rotation not because they’re exciting, but because they’re dependable. This creamy green chile taco baked chicken is exactly that kind of recipe: one bowl of sauce whisked together, poured over raw chicken breasts, and forty-five minutes later, dinner is done. No rolling, no layering, no separate sauce simmered on the stovetop — just a single baking dish doing all the work.
Flavor-wise, it lands somewhere between two familiar favorites: the tangy, chile-forward richness of green chile enchiladas, and the cheesy, creamy pull of a good taco dip. That combination, baked directly onto tender chicken breasts, is what makes this dish taste considerably more complex than its short ingredient list and minimal effort would suggest.
Why This Method Works So Well
The entire technique here hinges on one simple idea: instead of building a sauce separately and cooking the chicken separately before combining them, the raw chicken and the sauce go into the oven together from the very start. As the chicken bakes, it releases its own juices directly into the sour cream and cheese mixture surrounding it, which loosens and enriches the sauce even further as everything cooks. By the time the chicken reaches a safe internal temperature, the sauce has thickened slightly and taken on flavor from the chicken itself — something that wouldn’t happen nearly as effectively if the sauce were made and served separately after the fact.
That single-dish, single-bake approach is also what keeps this recipe realistically weeknight-friendly. There’s no juggling a skillet and an oven at the same time, no multi-step sauce reduction — just one bowl to mix and one dish to bake.
Why Pounding Uneven Chicken Breasts Actually Matters
Chicken breasts are notoriously uneven in thickness, often thin at one end and considerably thicker at the other. Baked as-is, that unevenness becomes a real problem: by the time the thick end reaches a safe internal temperature, the thin end has often overcooked and dried out.
Lightly pounding any noticeably thick breasts to a more even thickness before they go into the dish solves that problem before it starts. It doesn’t need to be dramatic — just enough to bring the whole piece closer to a uniform thickness — but that small step is often the difference between chicken that cooks evenly all the way through and chicken with one dry end and one perfectly tender end.
Why Draining the Green Chiles Isn’t Optional
Canned green chiles come packed in a fair amount of liquid, and if that liquid goes into the sauce along with the chiles themselves, it thins out what should be a thick, clingy mixture. A watery sauce doesn’t coat the chicken as effectively, tends to pool at the bottom of the dish rather than baking into a cohesive layer, and dilutes the tangy, chile-forward flavor that’s central to this dish. Draining the chiles thoroughly before they go into the mixing bowl keeps the sauce thick enough to actually cling to the chicken as it bakes.
The Recipe
Prep time: 10 minutes
Cook time: 35 minutes
Total time: 45 minutes
Servings: 4
Cuisine: Tex-Mex
Ingredients
- 4 boneless, skinless chicken breasts (about 1½ to 2 lb)
- 1 cup sour cream
- 1 cup shredded cheddar cheese (mild or sharp)
- 4 oz chopped green chiles, drained
- 2 tablespoons taco seasoning
- 2 tablespoons fresh lime juice (about 1 lime)
- ½ teaspoon salt, optional, to taste
- ¼ teaspoon black pepper
- Olive oil or cooking spray, for greasing the baking dish
- Fresh cilantro and lime wedges, optional, for serving
Instructions
- Preheat and prep the dish. Preheat the oven to 375°F and lightly grease a 9×13-inch baking dish.
- Prepare the chicken. Pat the chicken breasts dry and arrange them in a single layer in the prepared dish. If any breasts are noticeably thick on one end, pound them lightly to a more even thickness.
- Mix the sauce. In a medium bowl, stir together the sour cream, shredded cheddar, drained green chiles, taco seasoning, lime juice, salt, and black pepper until combined. The mixture will be thick and slightly chunky from the cheese and chiles — that’s exactly the right texture.
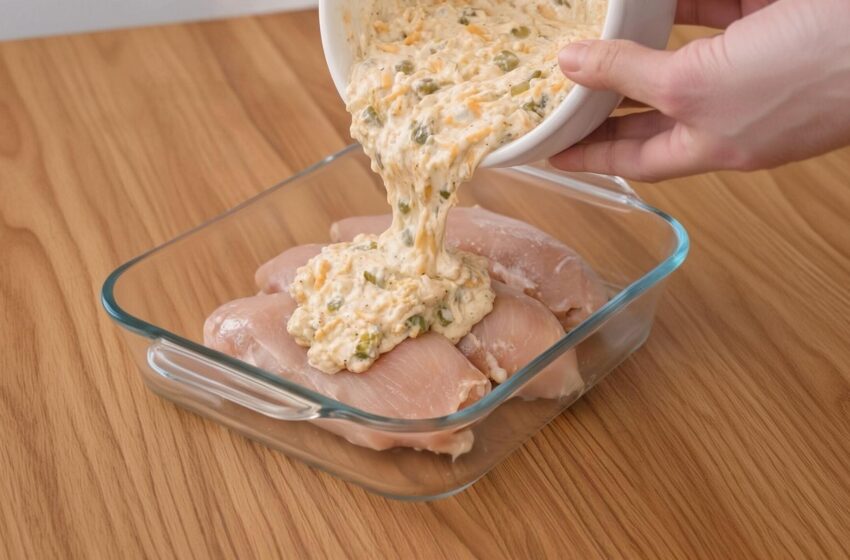
- Top the chicken. Spread the creamy green chile mixture evenly over the chicken breasts, covering each piece as thoroughly as you can. A perfectly even coating isn’t necessary — any exposed chicken fills in as everything bakes and the sauce spreads.
- Bake. Bake on the middle rack for 25 to 35 minutes, until the chicken reaches 165°F in the thickest part. Start checking around the 25-minute mark if your breasts are on the smaller side.
- Rest before serving. Let the chicken rest for about 5 minutes after baking. This short rest allows the sauce to thicken slightly and helps the chicken stay juicier once sliced.
- Garnish and serve. Top with fresh cilantro if desired, and serve with lime wedges on the side.
Tips for the Best Results
- Use a meat thermometer. Because the sauce covers the chicken, it can be hard to judge doneness visually. Checking for 165°F in the thickest part takes the guesswork out entirely.
- Drain the chiles well. Skipping this step is the most common reason the sauce turns out thinner and more watery than intended.
- Don’t skip the resting period. Cutting into the chicken immediately after baking lets both juice and sauce run out, leaving drier meat and a thinner sauce than if you’d waited the full five minutes.
- Adjust the salt based on your taco seasoning. Low-sodium seasoning blends may need a touch of extra salt to fully season the sauce.
A Few Ingredient Notes
For the cheese, shredded cheddar — mild or sharp — works well, and a Mexican cheese blend or pepper jack (for a bit of heat) are both easy substitutes depending on what’s already in the fridge. Sour cream gives the sauce its signature tang and richness, though Greek yogurt can be swapped in for a lighter, slightly tangier version if preferred. As for the green chiles, standard canned mild chiles work perfectly well here — there’s rarely a noticeable difference between name-brand and store-brand versions in a dish like this.
Variations Worth Trying
- For more heat: use hot green chiles instead of mild, add a pinch of cayenne to the sauce, or stir in a few dashes of hot sauce.
- To make it a full one-dish meal: scatter a can of drained black beans and a cup of frozen corn around the chicken before adding the sauce on top, turning it into a heartier, more complete dinner.
- For a lighter version: swap half the sour cream for plain Greek yogurt. The result will be tangier and slightly less rich, but still genuinely good.
What to Serve It With
This dish is essentially a vehicle for its own rich, tangy sauce, so it pairs naturally with something absorbent. Cilantro-lime rice or plain white rice both work well, as do warm tortillas for scooping up extra sauce, or tortilla chips if you’d rather skip utensils altogether. A simple side salad or roasted vegetables round out the meal without competing with the main dish’s richness.
Leftovers Worth Looking Forward To
Leftovers here hold up remarkably well — sliced cold and tucked into tortillas with a bit of shredded lettuce and extra sauce spooned on top, they turn into next-day tacos with almost no additional effort. They also work well served cold over greens with a squeeze of lime for a quick taco salad. Stored in the refrigerator, leftovers keep for about three to four days; reheat gently, giving the sauce a stir partway through if it looks slightly separated, which brings it right back together.
Why This Recipe Earns a Permanent Spot in the Rotation
There’s nothing flashy about this dish, and it doesn’t try to be. What it offers instead is reliability: a short ingredient list built from pantry staples, a genuinely simple method, and a flavor combination — creamy, tangy, chile-forward — that tends to please a wide range of eaters without complaint. For a weeknight dinner that comes together in under an hour with minimal cleanup, that kind of dependability is worth more than most people expect going in.