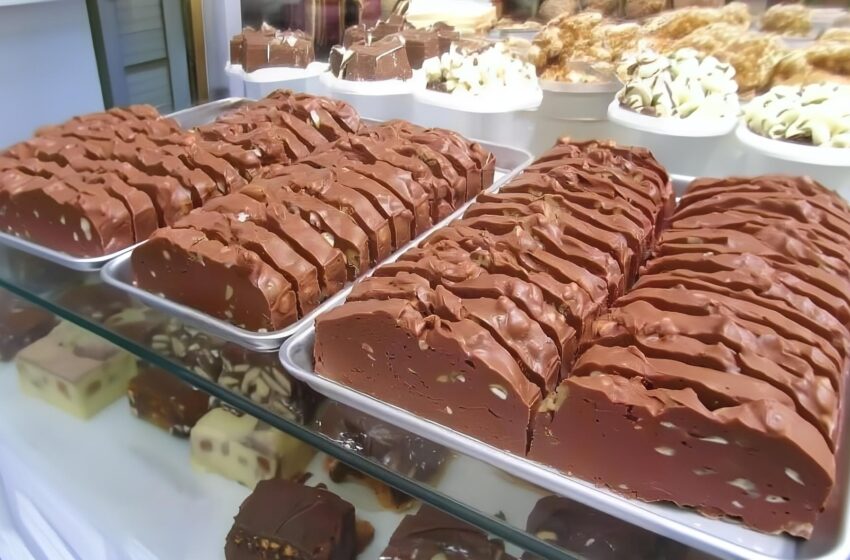
Fudge has a reputation for being finicky — a dessert that demands a candy thermometer, careful temperature monitoring, and a fair amount of nervous stirring to avoid a grainy, seized mess. This Toll House-style fudge sidesteps all of that. Built around sweetened condensed milk, marshmallow creme, and chocolate chips, it’s the kind of recipe that’s been handed down for generations precisely because it removes nearly every opportunity for failure, while still delivering that dense, rich, melt-in-your-mouth texture people expect from real fudge.
It’s an old-fashioned holiday staple, but there’s no real reason to save it for December — shaped into a simple slab, cut into squares, or pressed into small candy tins, it works just as well any time a chocolate craving needs answering.
Why This Method Skips the Candy Thermometer Entirely
Traditional fudge recipes rely on cooking sugar syrup to a very specific temperature — the “soft ball” stage — which is exactly why so many home cooks find the process intimidating. Miss that temperature window even slightly, and the fudge can turn out grainy, too soft to set, or rock hard.
This version avoids that entire process by leaning on sweetened condensed milk instead of a cooked sugar syrup. Condensed milk is already thick, sweet, and stable, meaning the “cooking” step here is really just gently melting everything together until smooth, rather than monitoring sugar crystallization at a precise temperature. That’s what makes this fudge so forgiving — there’s no soft-ball stage to miss, no thermometer required, and very little room for the process to go wrong.
What Marshmallow Creme Is Actually Doing Here
Marshmallow creme might look like it’s just there for extra sweetness, but it plays a real structural role in this fudge. Its light, airy, slightly gelatinous texture helps prevent the sugar in the mixture from recrystallizing as the fudge cools — one of the most common causes of grainy, gritty fudge. By keeping sugar crystals from reforming into a coarse structure, marshmallow creme helps the finished fudge set into that smooth, dense, fudgy texture rather than something crumbly or sandy.
It also contributes to the fudge’s characteristic soft chew, giving it a texture that’s dense without being hard, and rich without being overly stiff.
Why This Works So Well as a Wreath — or However Else You Want to Shape It
Because this fudge sets up reliably without needing to be poured at a precise temperature, it’s flexible enough to be shaped however suits the occasion. Pressed into a round mold or piped into a wreath shape, it makes a festive holiday centerpiece. Poured into a simple lined baking sheet and cut into squares, it becomes a straightforward, everyday treat. Portioned into small candy tins, it turns into an easy homemade gift. The base recipe doesn’t change regardless of the final shape — only the mold or pan you choose to set it in.
The Recipe
Ingredients
- 3 cups semi-sweet chocolate chips
- 1 (14-ounce) can sweetened condensed milk
- 2 tablespoons unsalted butter
- 1 cup marshmallow creme
- 1 teaspoon vanilla extract
- ½ teaspoon salt
- 1 cup chopped nuts (walnuts or pecans), optional
Instructions
- Prepare your pan or mold. Line an 8×8-inch baking dish with parchment paper, leaving some overhang on the sides for easy removal, or lightly grease a decorative mold or wreath pan if you’re going for a festive presentation.
- Melt the base ingredients. In a medium saucepan over low heat, combine the chocolate chips, sweetened condensed milk, and butter. Stir constantly until the mixture is fully melted and smooth — this should take just a few minutes over gentle heat, with no need for a candy thermometer.
- Add the marshmallow creme. Remove the pan from the heat and stir in the marshmallow creme, vanilla extract, and salt until fully incorporated and smooth.
- Fold in the nuts, if using. Gently fold in the chopped nuts, distributing them evenly throughout the mixture.
- Transfer to the pan. Pour the fudge mixture into the prepared pan or mold, smoothing the top with a spatula.
- Chill until set. Refrigerate for at least 2 hours, or until the fudge is fully firm to the touch.
- Cut and serve. Lift the fudge out using the parchment overhang, then cut into squares (or unmold, if using a decorative shape). Store in an airtight container.
Tips for the Best Results
- Stir constantly while melting. Chocolate and condensed milk can scorch if left unattended over heat, even on low, so consistent stirring keeps the mixture smooth and prevents burning.
- Use good-quality chocolate chips. Since chocolate is the dominant flavor here, the quality of the chips has a real impact on the final taste.
- Don’t rush the chilling time. Fudge needs adequate time in the refrigerator to fully set; cutting into it too early can result in a softer, less clean-cut texture.
- Line your pan with parchment. This makes removing and slicing the finished fudge significantly easier, especially for a dense, sticky mixture like this one.
- Toast the nuts beforehand, if using. A quick toast in a dry skillet deepens their flavor before folding them into the fudge.
Variations Worth Trying
- Go festive with a wreath shape. Piped or pressed into a decorative ring mold and topped with a few candied cherries or a light dusting of powdered sugar, this fudge makes an easy, eye-catching holiday centerpiece.
- Try white chocolate. Swapping semi-sweet chips for white chocolate chips creates a completely different flavor profile while keeping the same reliable method.
- Add a swirl. A few tablespoons of peanut butter or a different flavor of chocolate can be swirled into the top of the fudge just before it sets for a marbled effect.
- Package it as a gift. Cut into small squares and packed into individual candy tins or a decorative box, this fudge makes a simple, homemade holiday gift that travels well.
Storage Notes
Stored in an airtight container, this fudge keeps well at room temperature for up to a week, or in the refrigerator for up to two weeks if you prefer it firmer. It also freezes well — wrapped tightly and stored in a freezer-safe container, it keeps for up to three months, making it easy to prepare well ahead of a holiday gathering or gift-giving occasion.
Why This Recipe Has Stuck Around for So Long
What makes this fudge such a reliable favorite isn’t just its rich, chocolatey flavor — it’s how little can actually go wrong in the process. No candy thermometer, no monitoring sugar syrup for a precise stage, no real risk of the whole batch seizing or turning grainy if you look away for a moment. It’s the kind of dessert that lets even an inexperienced cook produce something that looks and tastes like it took far more skill than it actually required — which is exactly why it’s remained a go-to recipe for generations, whether shaped into a festive wreath or simply cut into everyday squares.